

How To Build A Window Seat With Storage
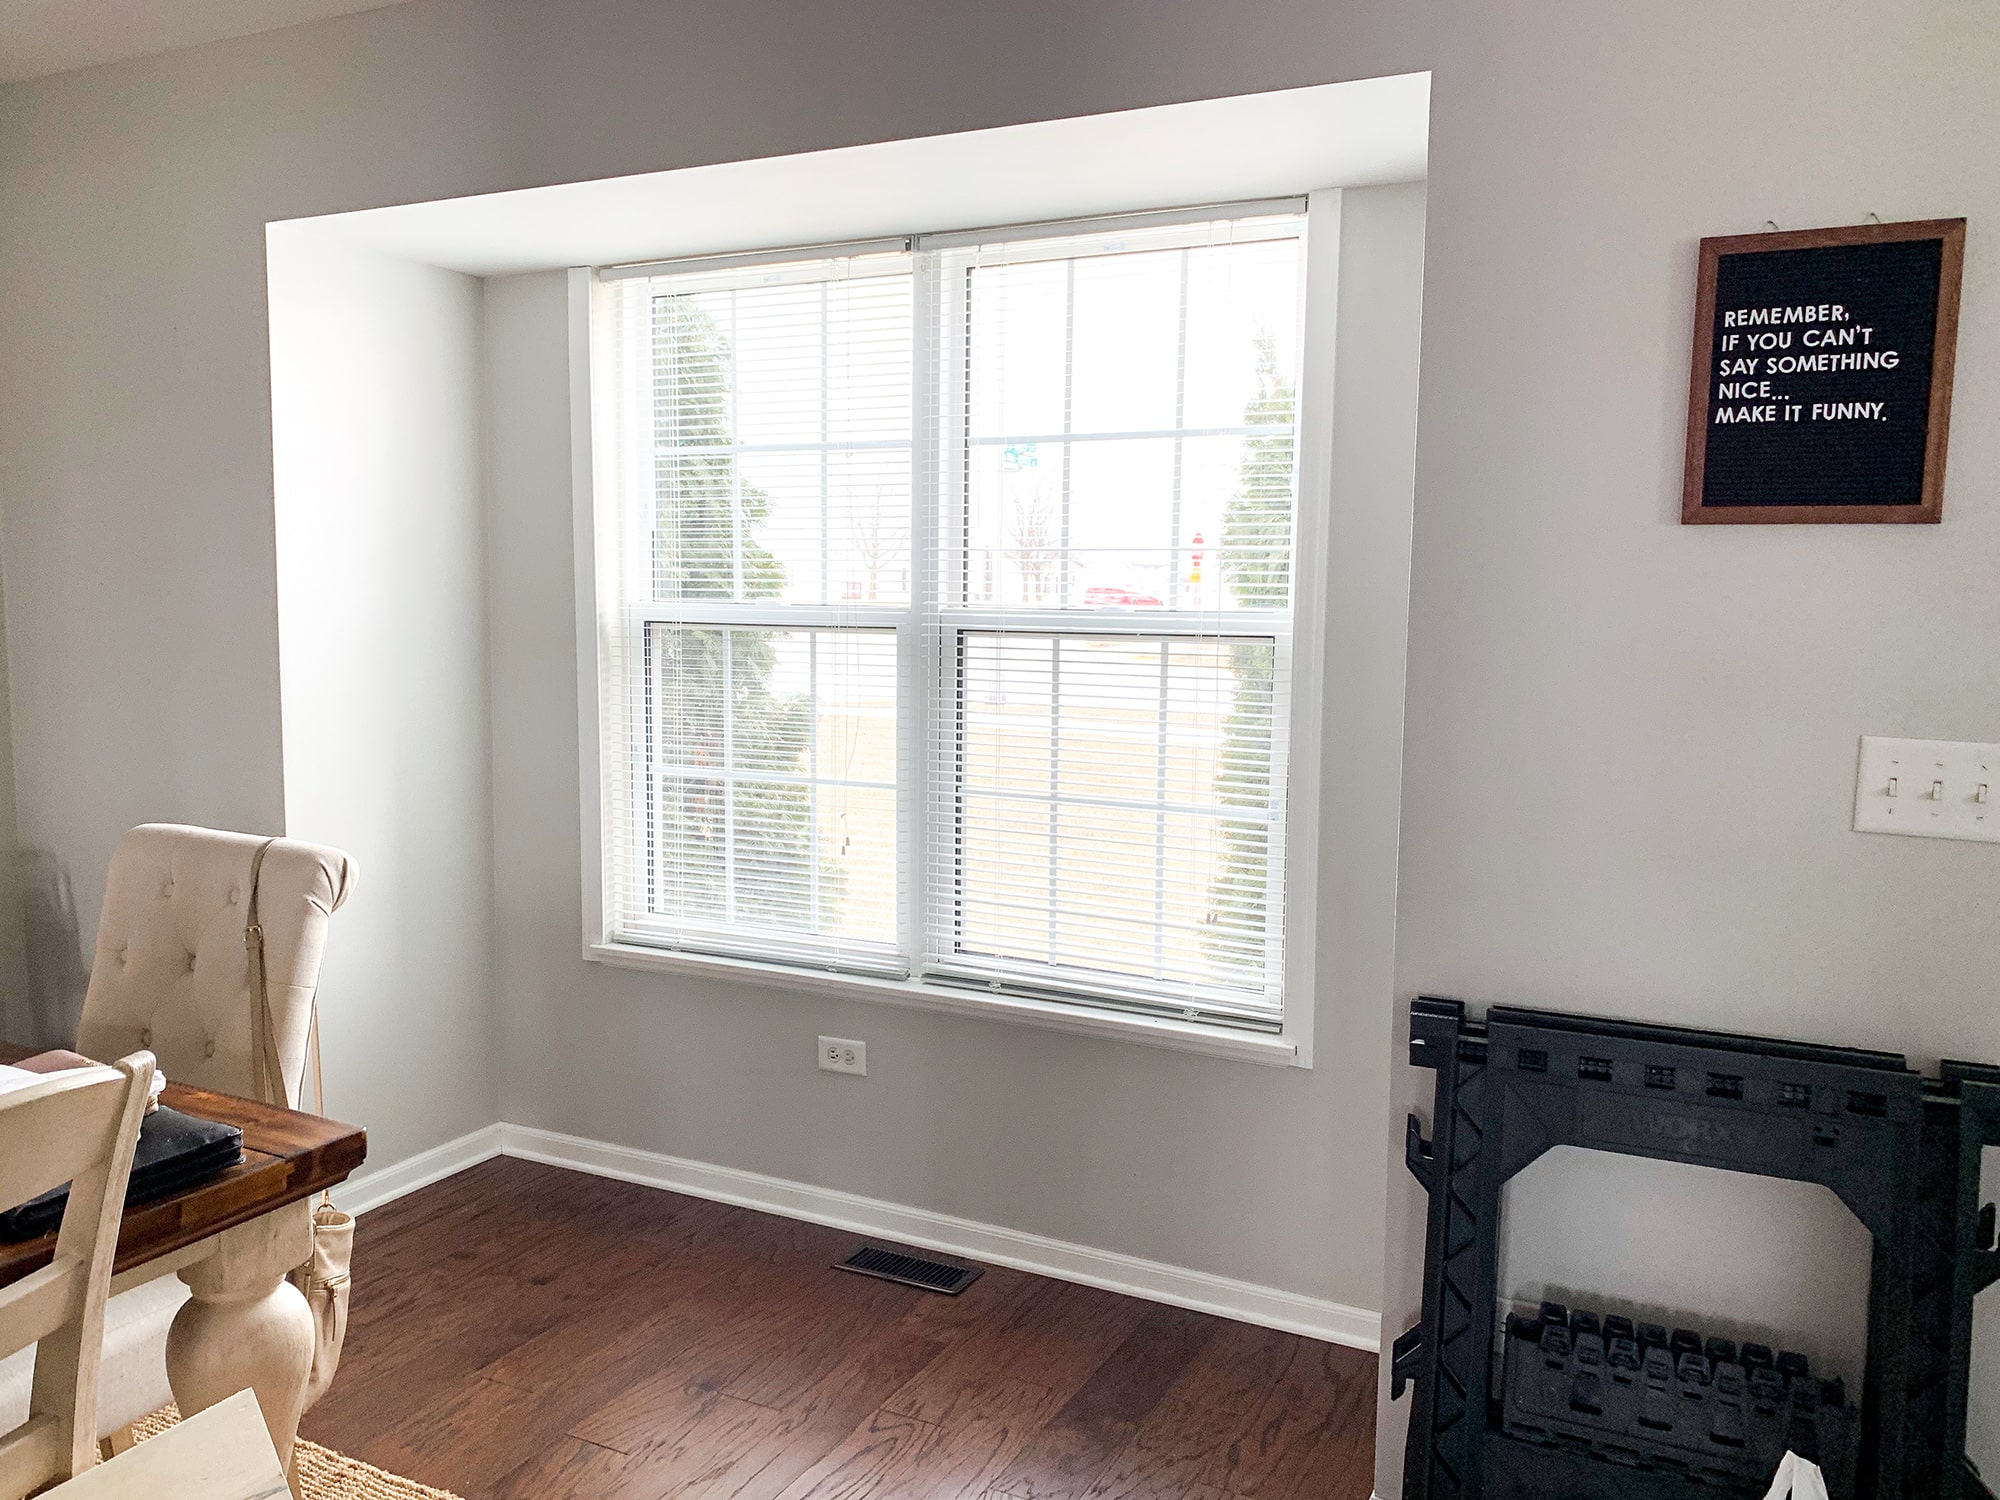
Another projection that has long been overdue! This little window nook was one of the spots in our business firm that sold united states when we bought it. When we did the home tour, I hands envisioned a little sitting and reading nook for the window. Well, over 3 years later on, nosotros FINALLY have our window seat nook! We apparently have a long to-do list seeing that it's already been three years and we simply got around to completing this project!
Actually, 1 of the main reasons that we waited so long to consummate this project was because this window seat nook is where we had our puppy playpen and crates. This window seat is correct off our entryway and so information technology was hands attainable to get to when nosotros came dwelling house to permit the puppies out. But! Figgy and Frankie no longer need a playpen and if you've been here before, you know that I recently completed our entryway closet makeover – the new spot for the dog crates! Which left usa with an empty infinite and the perfect opportunity to get started on the window seat project.
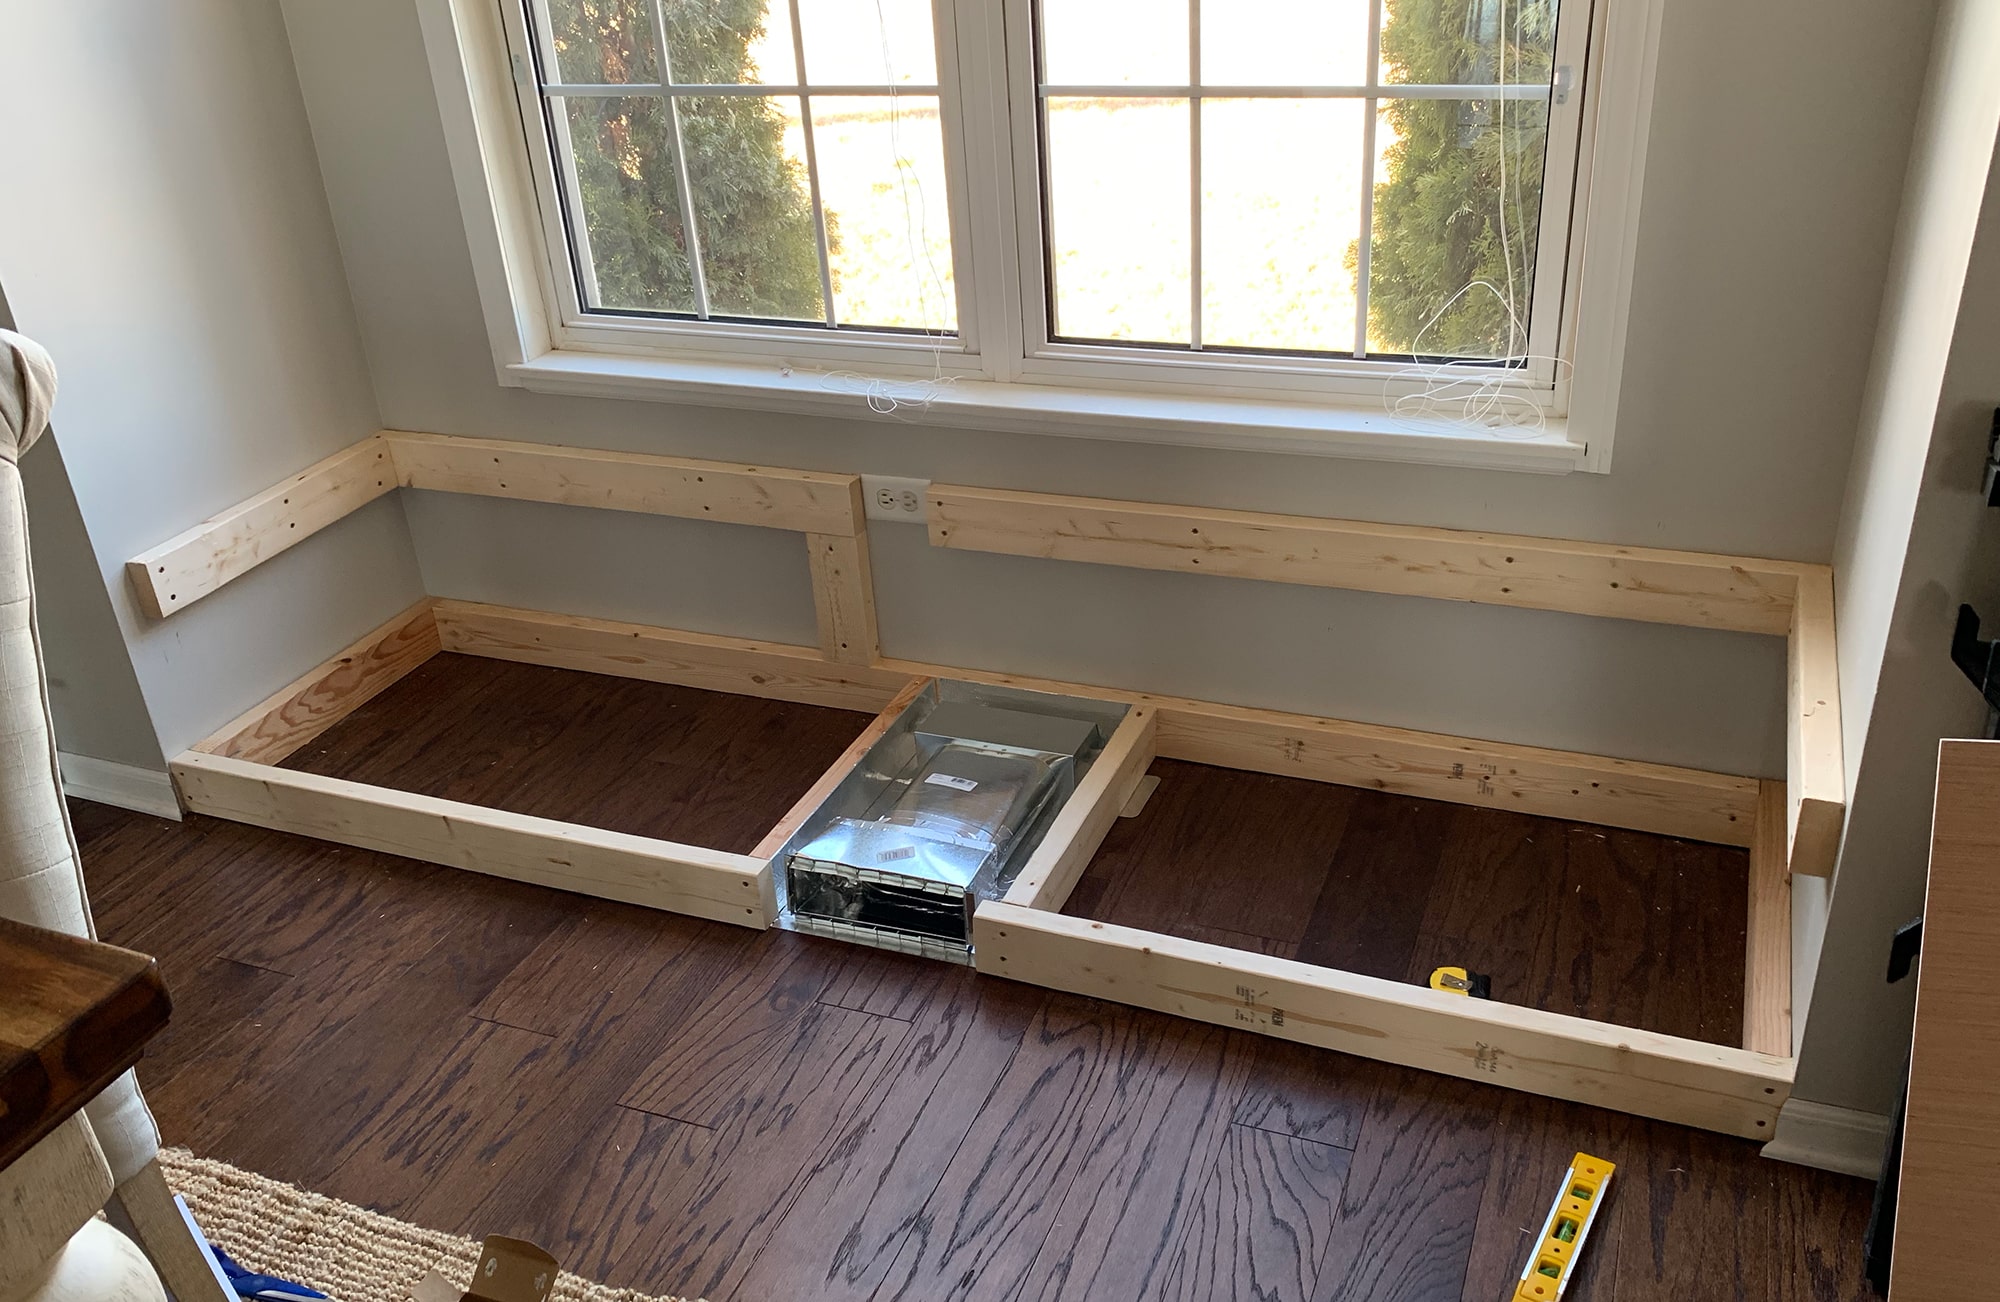
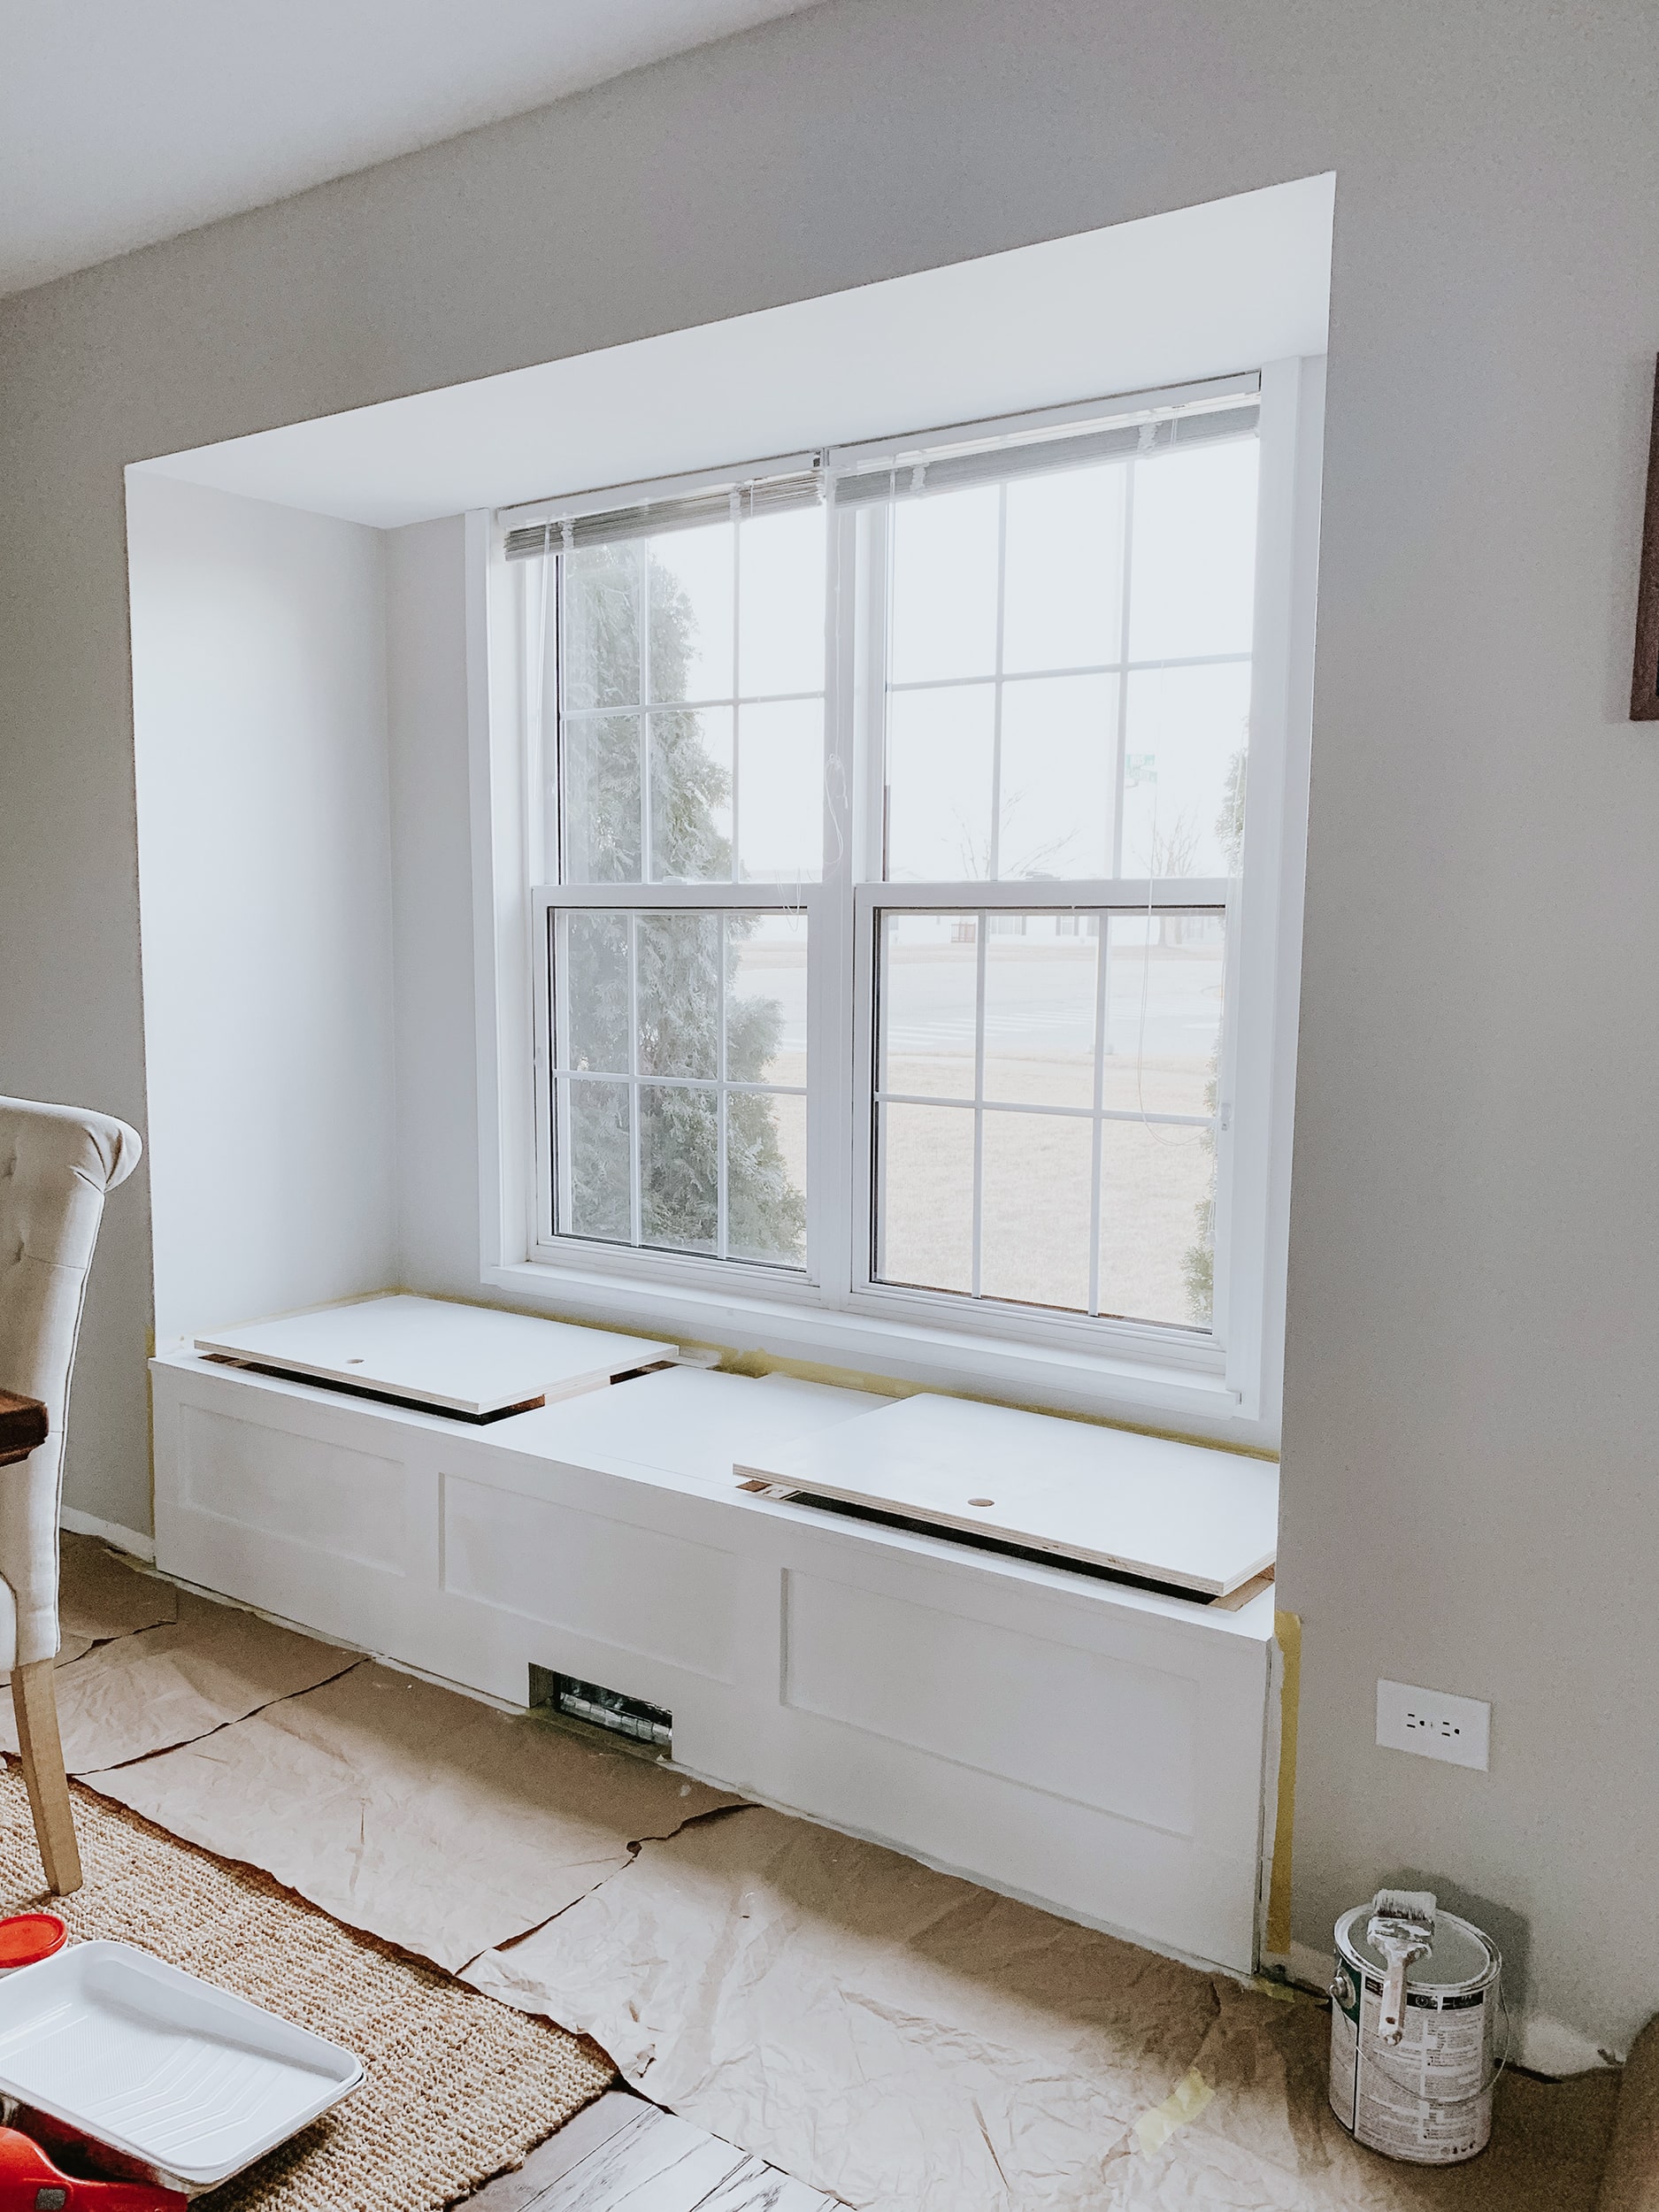
Check out what it looked like before we started! Simply an empty space waiting for some dearest!
How to Build a Window Seat
This mail may contain affiliate links where nosotros earn a pocket-size commission on your purchases at no additional cost to you.
Our window seat is 89 1/4″ wide ten 16 3/4″ tall x 24.25″ deep. The below supplies is what we needed for our window seat size, so you tin use this as a full general guide as to what wood pieces you lot'll demand. Basically, the entire construction is built with all 2x4s. Nosotros had some fleck 2x4s from other projects, so used what we had leftover and then bought some additional 2x4x8s. The remainder of the supplies listed is all for the finishing look!
Likewise, we decided to add hidden storage underneath the seat. Who doesn't love extra storage?! The supply listing beneath includes what nosotros used to create that as well. Since this bench seat is so long, we created ii hidden storage doors. We program to apply these to shop all our patio cushion seats in the wintertime since it'south not the near accessible to get to since we have the seat cushion above the doors.
WHAT We USED FOR SUPPLIES
- ane – 3/four x 2 x 8′ Plywood Panel
- ane – 1/8 x 4 x eight′ Sanded Plywood Panel (nosotros actually like using this plywood paneling for projects. It'south a little thicker than i/8″)
- ten – 2 x 4 x viii′
- ane – 1 x 3 x 8′
- 1 – 1x six x 8′ primed MDF board
- ane – 1 ten three x 8′ primed MDF lath
- 1 – 1 x 4 x 8′ primed MDF board
- 2 ane/2″ screws
- 2″ screws
- 2 – 1 1/2 x thirty″ Piano hinges (for hidden storage)
- White Spray Pigment (for subconscious storage)
- Finishing nails
- Caulk
- Pigment
THE TOOLS
- Miter Saw
- Circular Saw or Table Saw for ripping wood (I got this round saw this past Christmas and it's AMAZING)
- Jig Saw (we needed this for the air vent)
- Kreg Jig
- Brad Nailer
- i ane/2″ Hole Saw drill bit (for hidden storage)
- Drill
- Level
- Measuring Record
- Pencil
- Stud Finder
- Safety Spectacles
Building The Frame
I am 110% a visual person. Then before nosotros showtime any project that requires extensive building, I like to draw up some "Structural" plans on how information technology should exist built. Nosotros use this as our guide and what nosotros refer to every bit nosotros are building. It's definitely helpful to have! I don't take any fancy software that creates 3-D views, so all of these are just apartment, 2-D views, but it works! I'll share those with you forth with the process photos we take, and so you can reference between the ii.
Step 1 – Floor Pieces
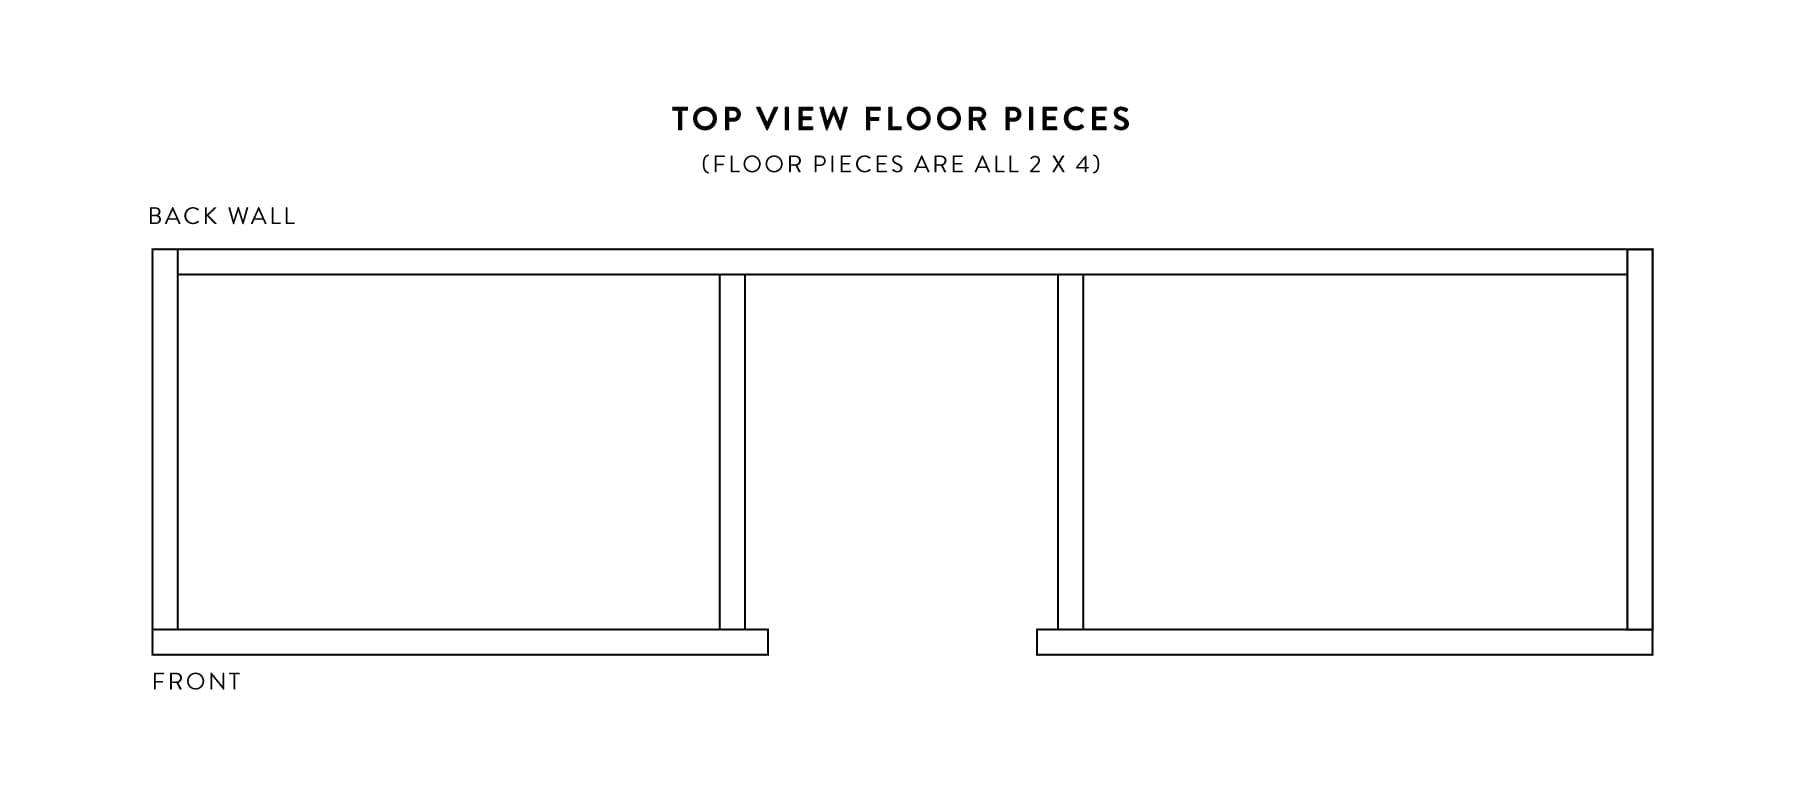
Beginning, we removed all the floor moldings since we will no longer need those. Then, we started edifice the window seat by building the floor frame first. When you adhere the ii ten 4s to the wall, e'er brand sure to screw into the studs for maximum support. We used 2 screws per stud.
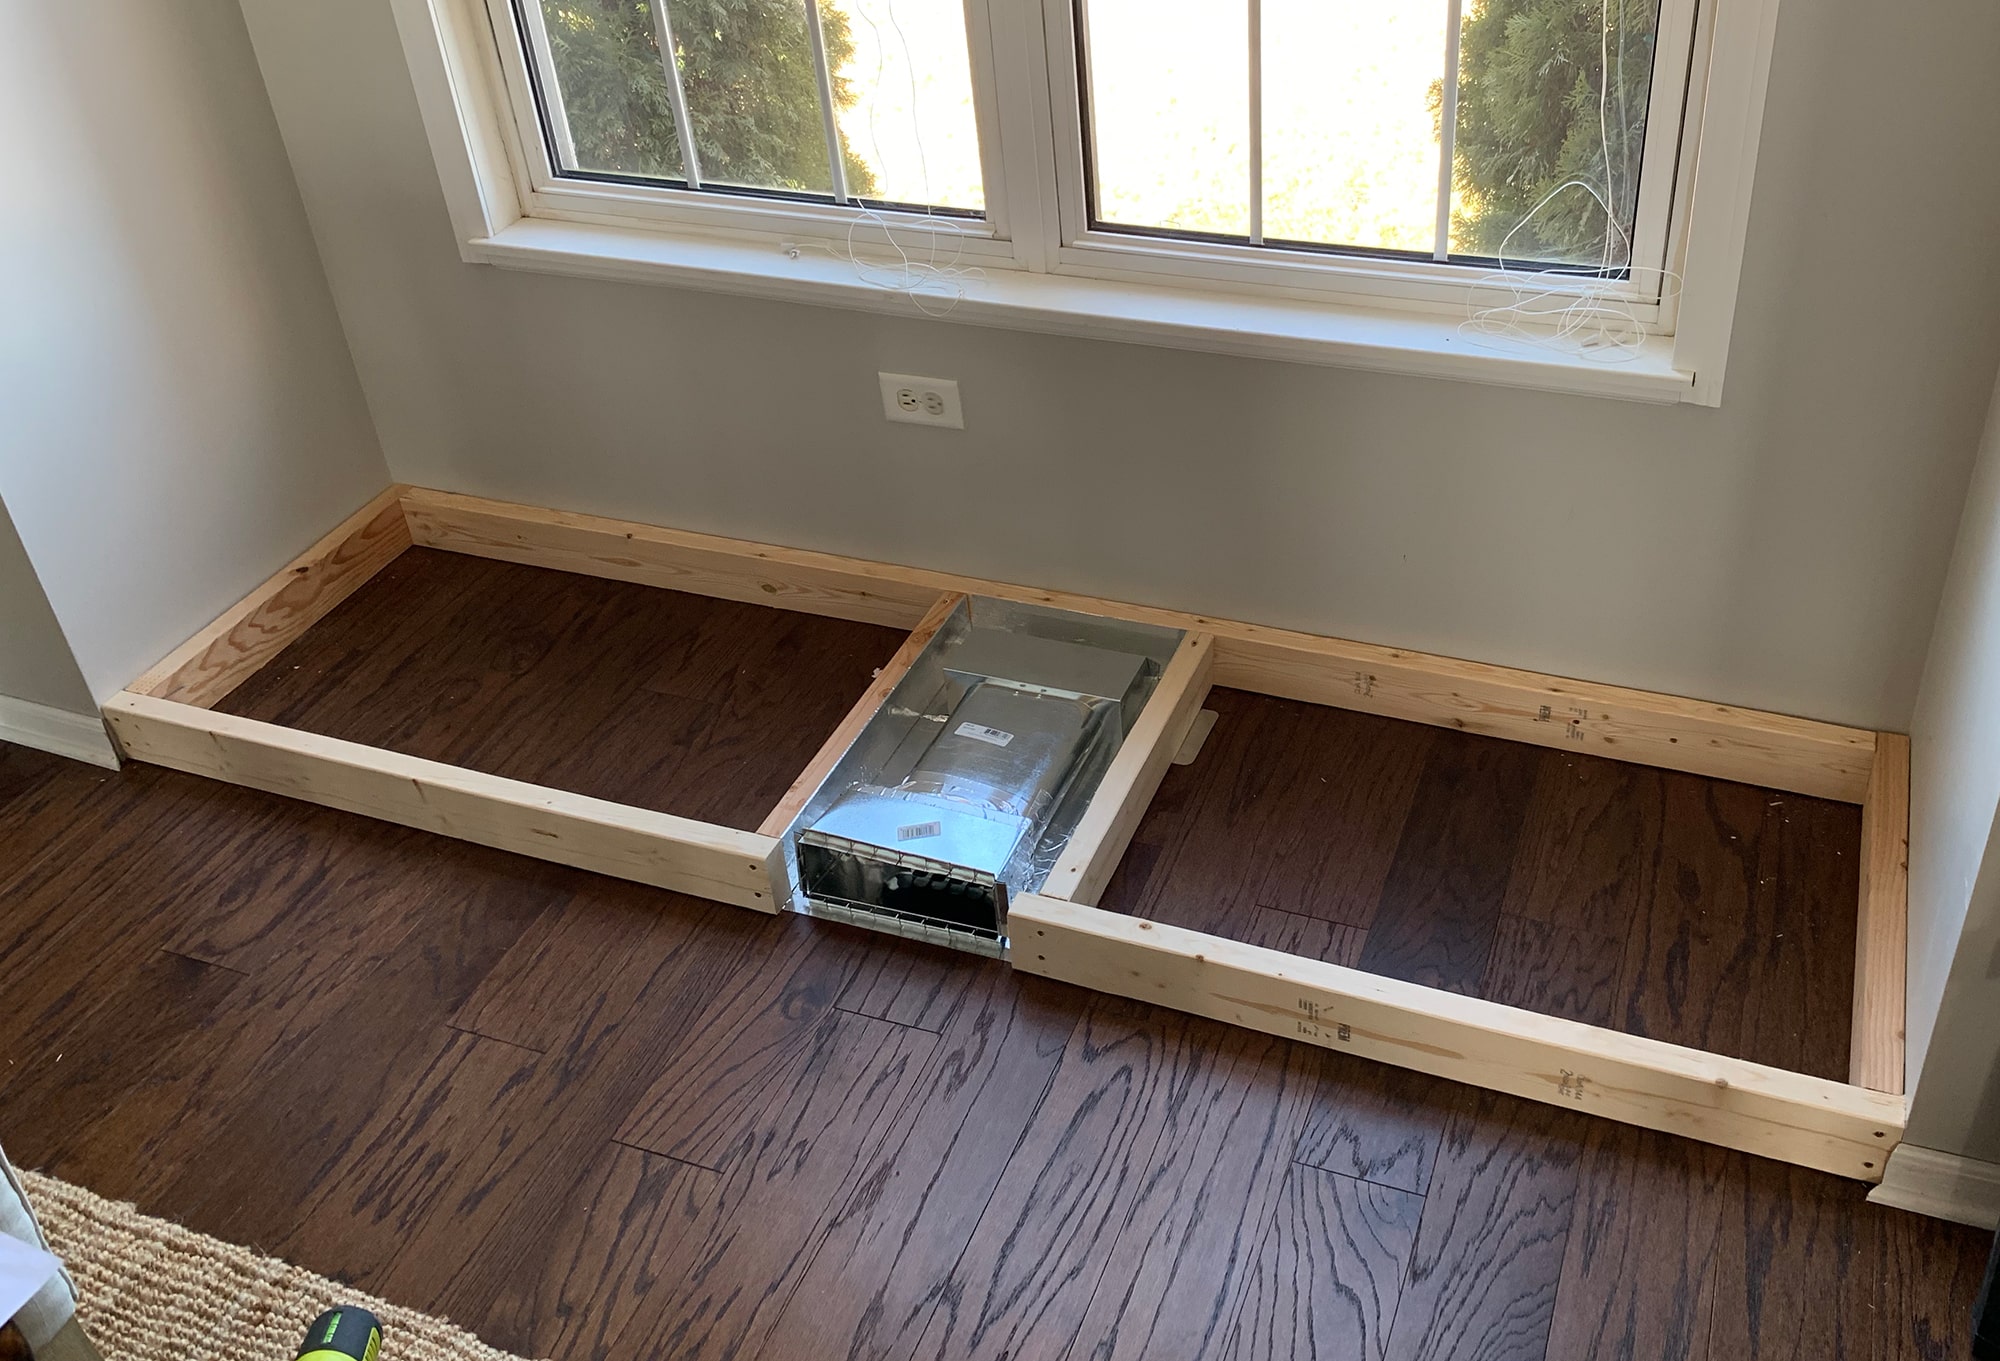
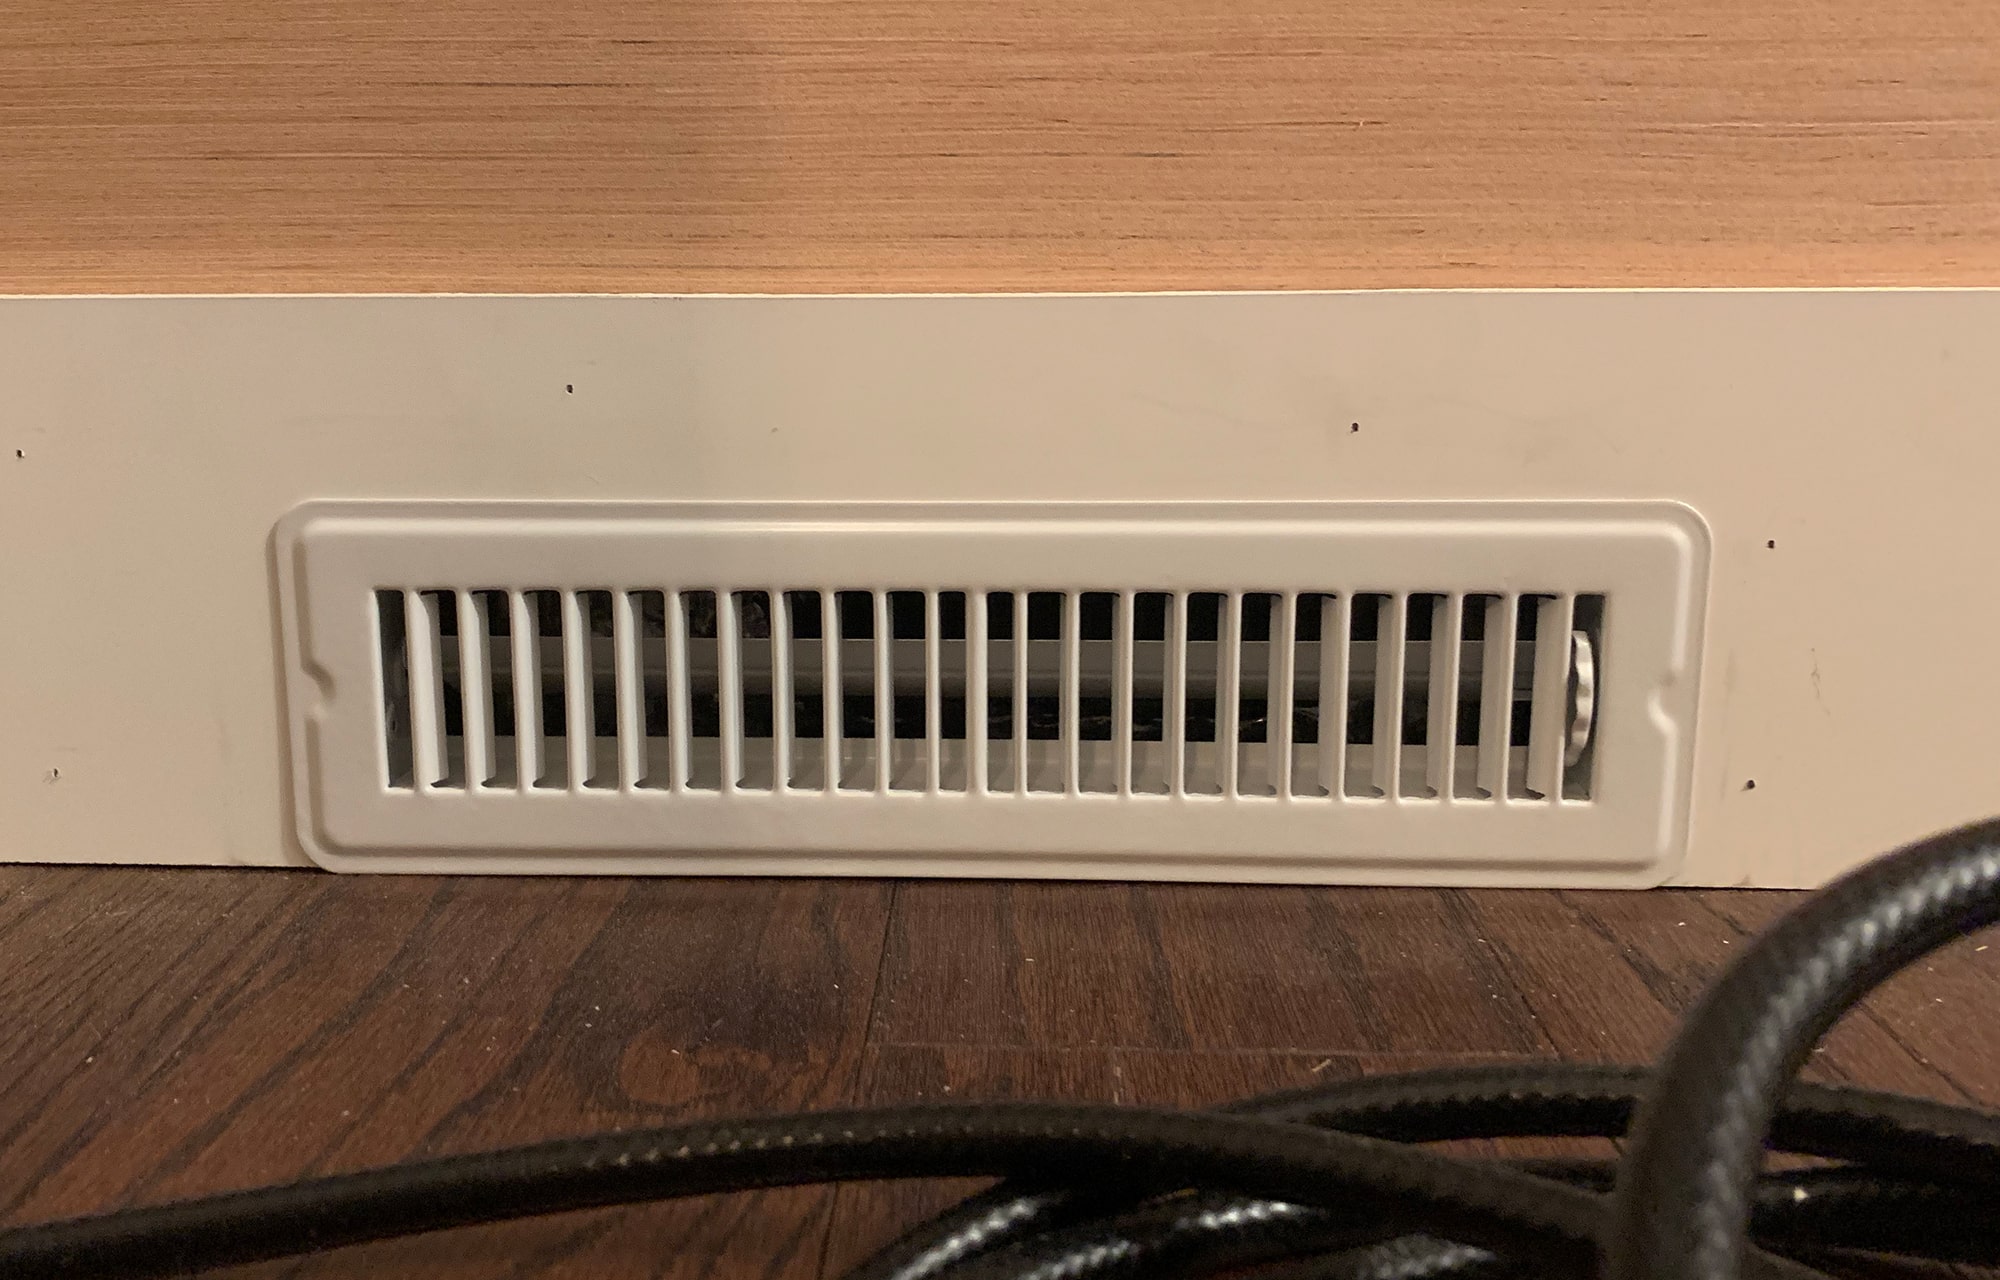
As you lot can meet, we have a floor air vent in the nook surface area. And so, we had to extend the air duct out to the forepart of the window seat and decided to box in that section of the window seat. Nosotros likewise lined the floor with the aluminum foil tape to seal the entire air duct nosotros added here.
Of import tip
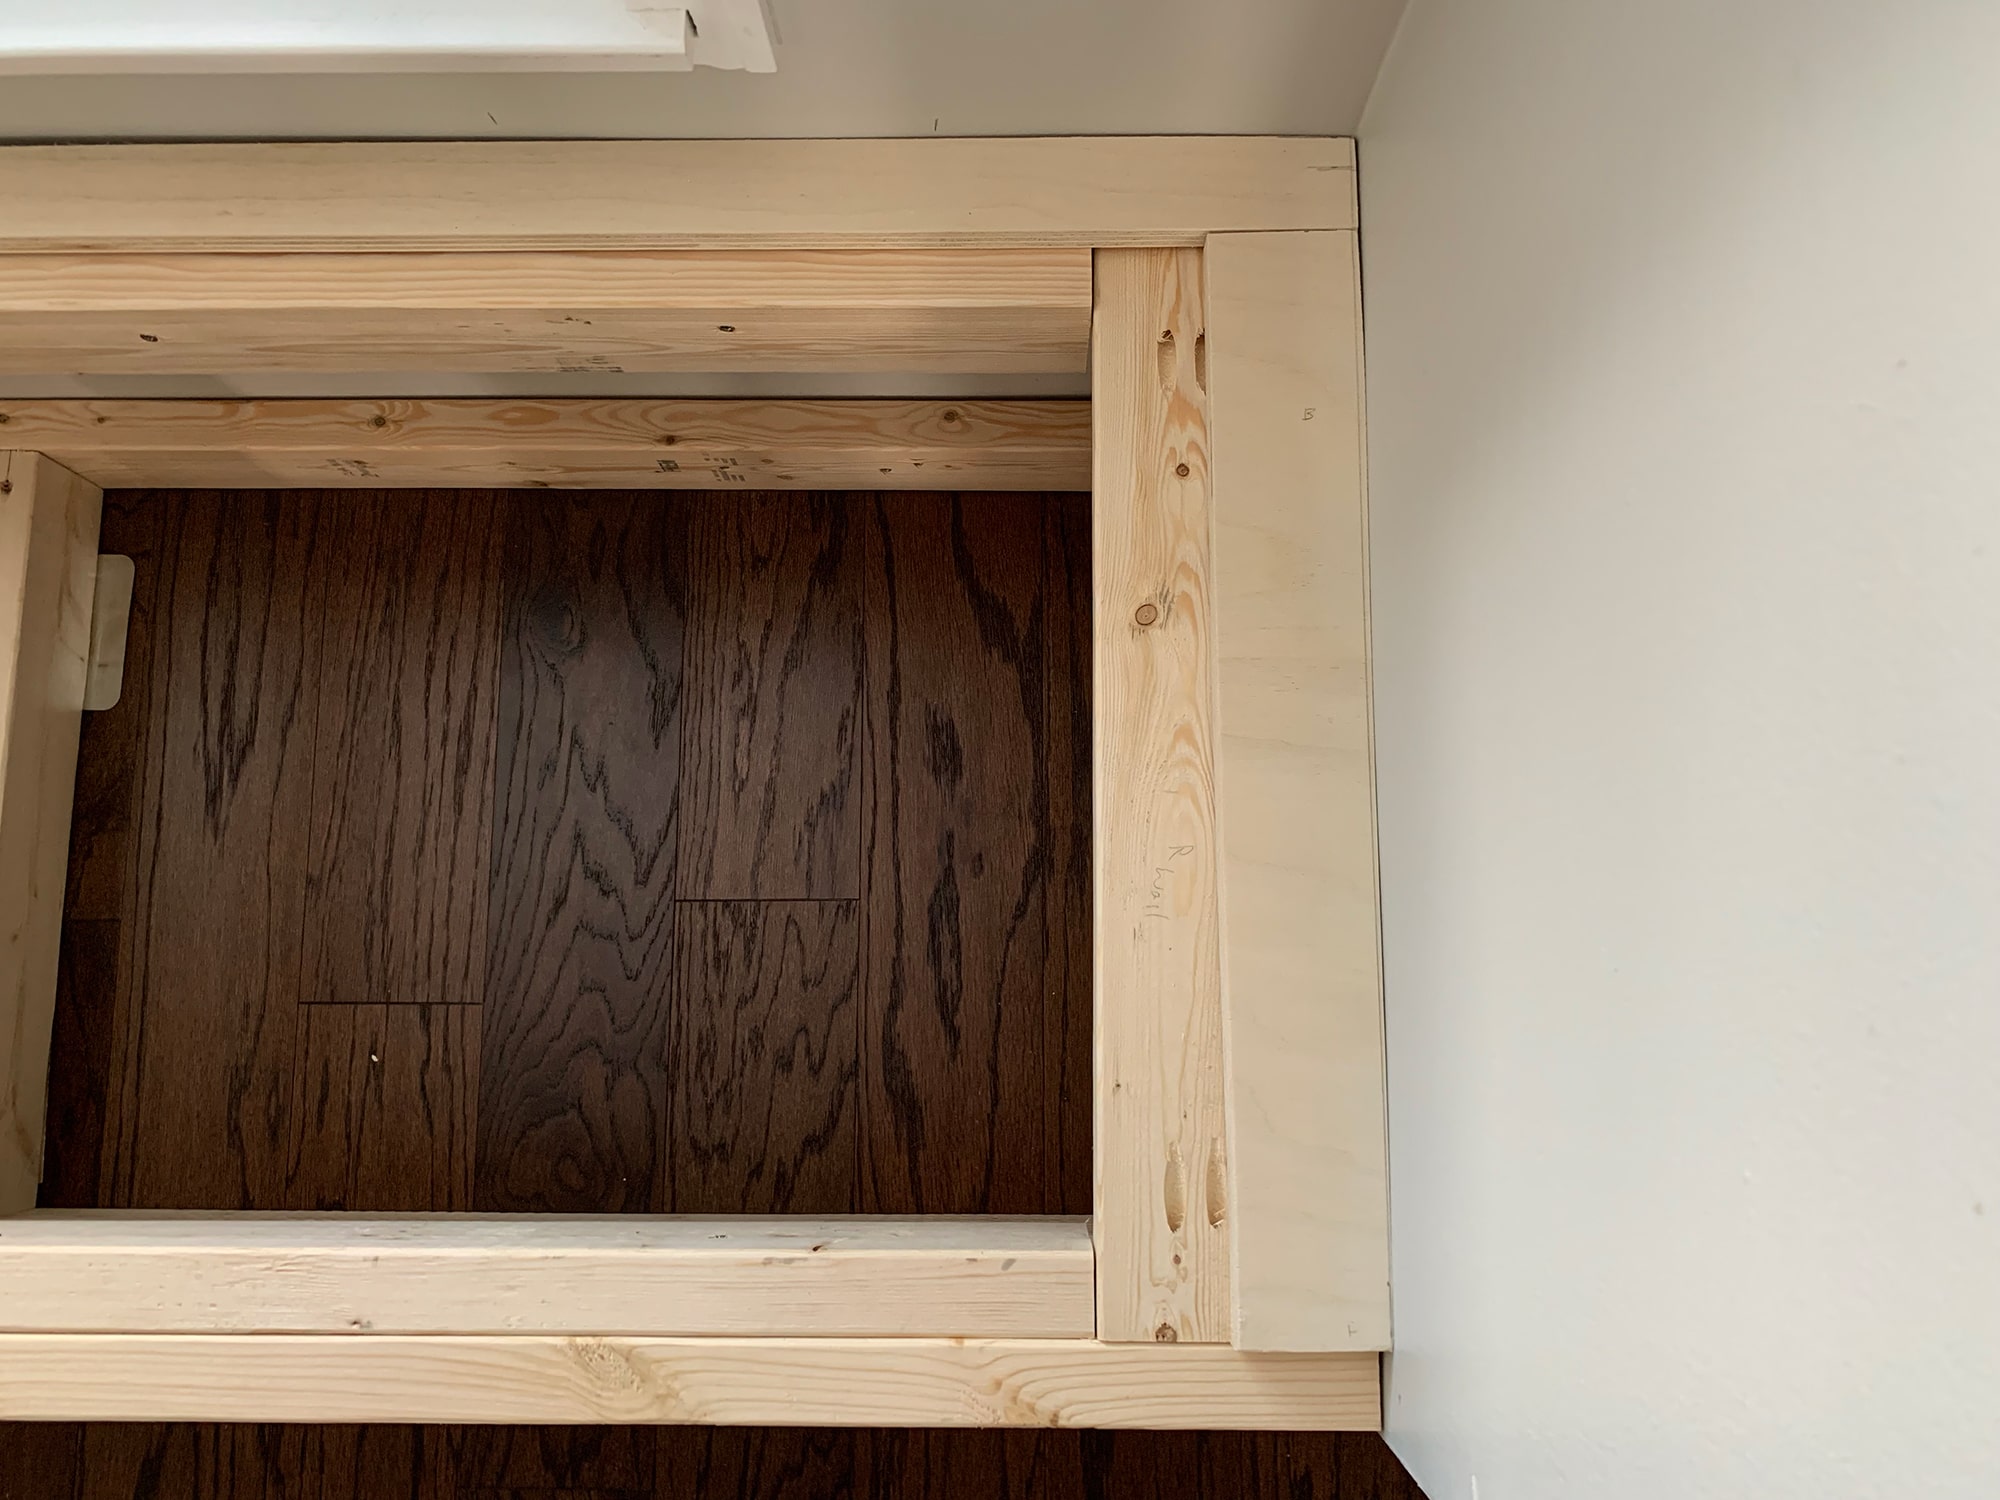
Nosotros built our construction to be flush with the forepart wall since we decided to add window trim around the window seat area. In doing and so, the front finishing pieces nosotros added to the window seat, volition sit down flush with the trim pieces. If you lot don't programme to add trim effectually the nook and desire your seat to sit flush inside the window nook surface area, make certain to conform the depth of your seat to fit those front structure pieces within the space.
STEP 2 – Add Wall Back up Pieces
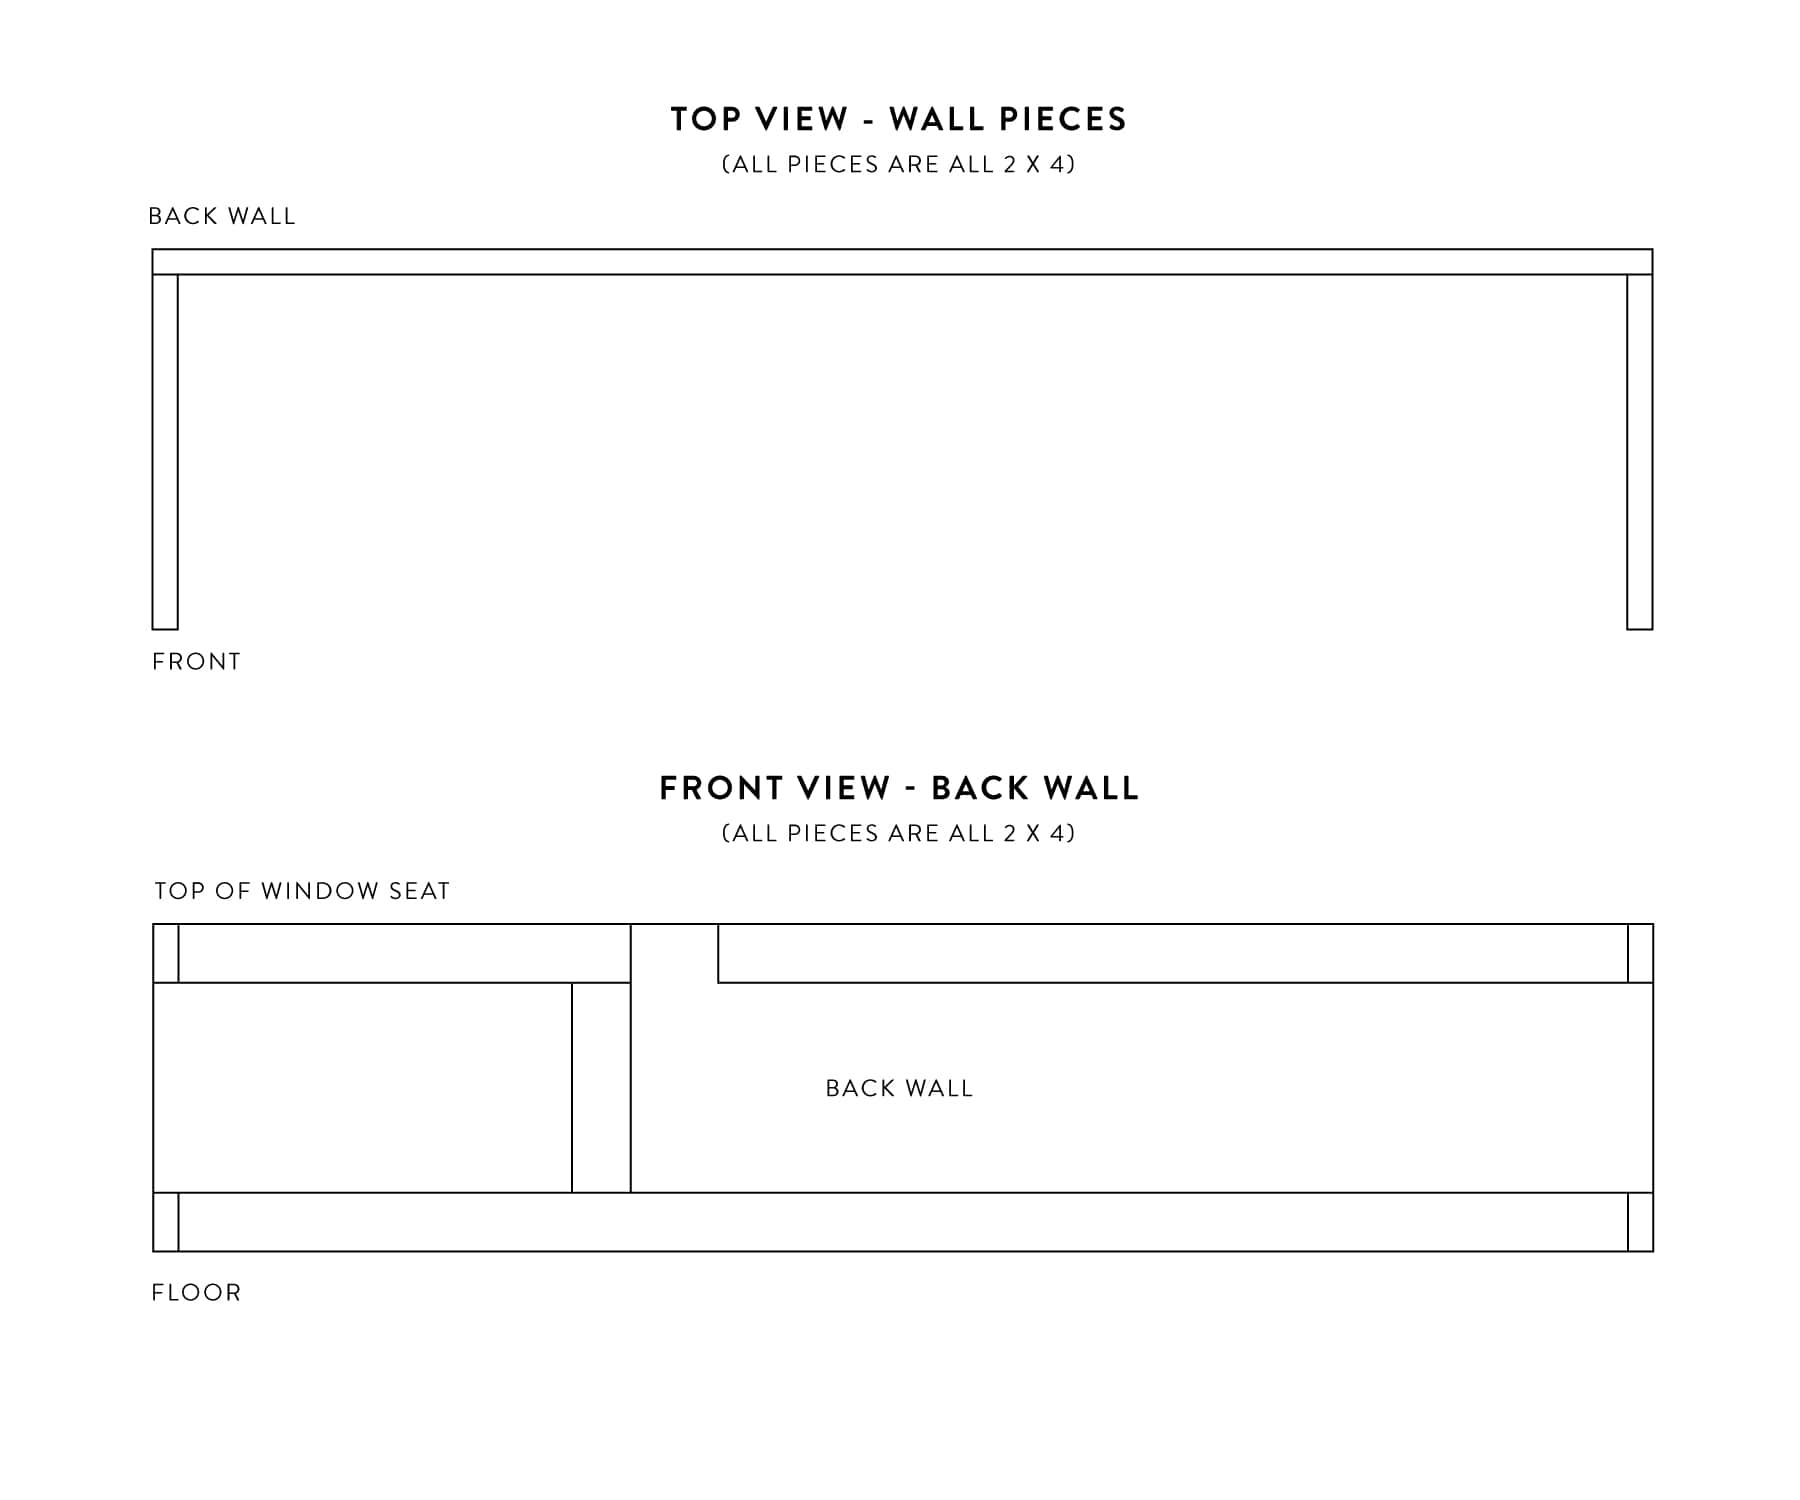
Once we had all the floor pieces cut and installed, nosotros added the wall support pieces to the back and sidewalls of the window seat. Again, nosotros used 2x4s pieces and made certain to screw into the studs!
Don't forget to grab your level to brand sure your boards are level on the wall! Information technology also helps to measure and draw your lines on each end of the where the boards will exist placed to ensure they're level (unless you have united nations-level floors… 😬).
Every bit you can run into in the in a higher place photograph, and within our plans, we have an outlet on our back wall. And so, we had to cutting around that for the back wall support.
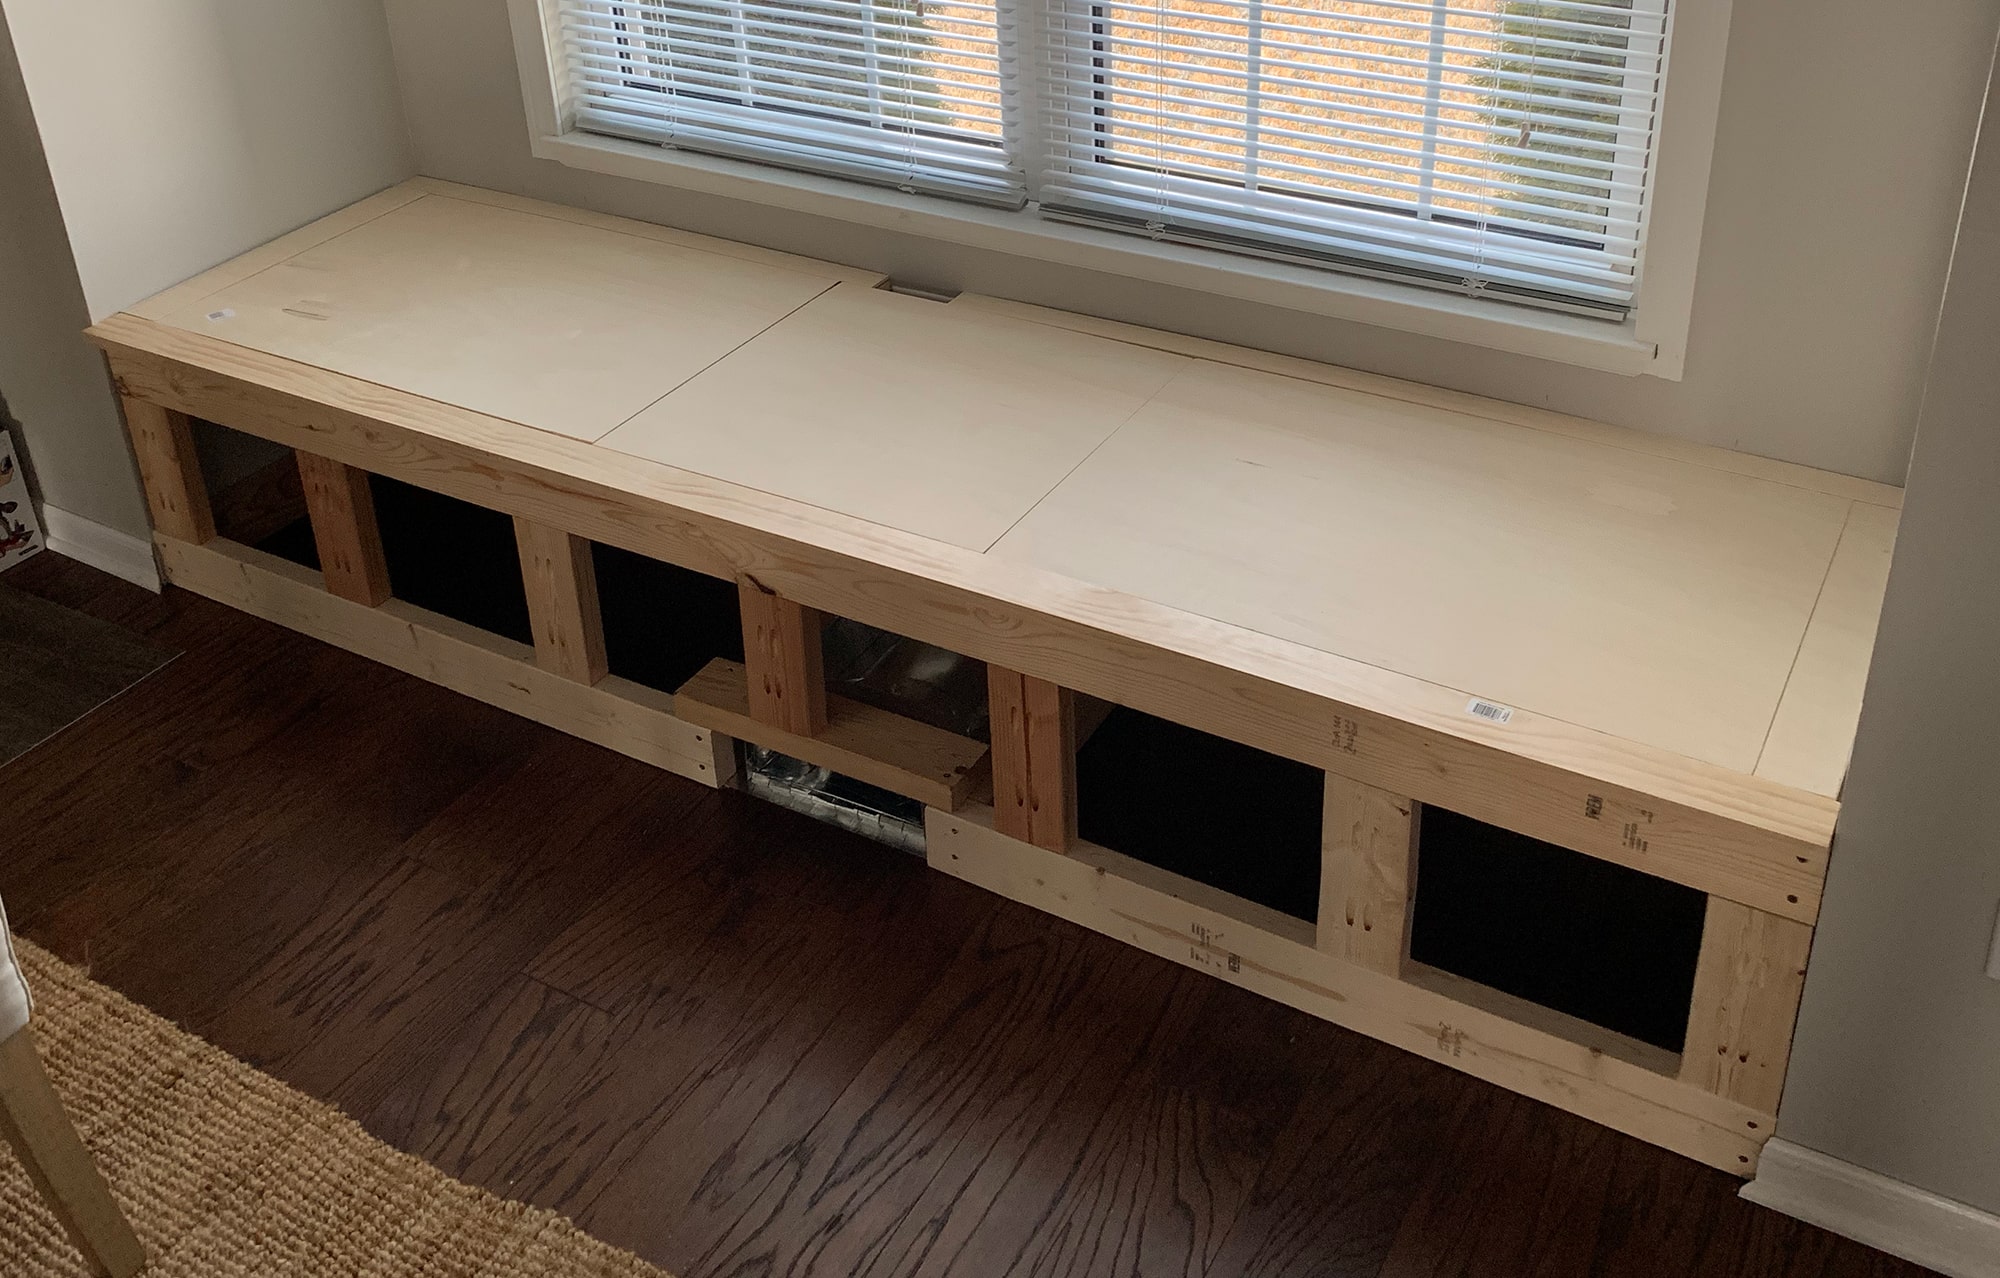
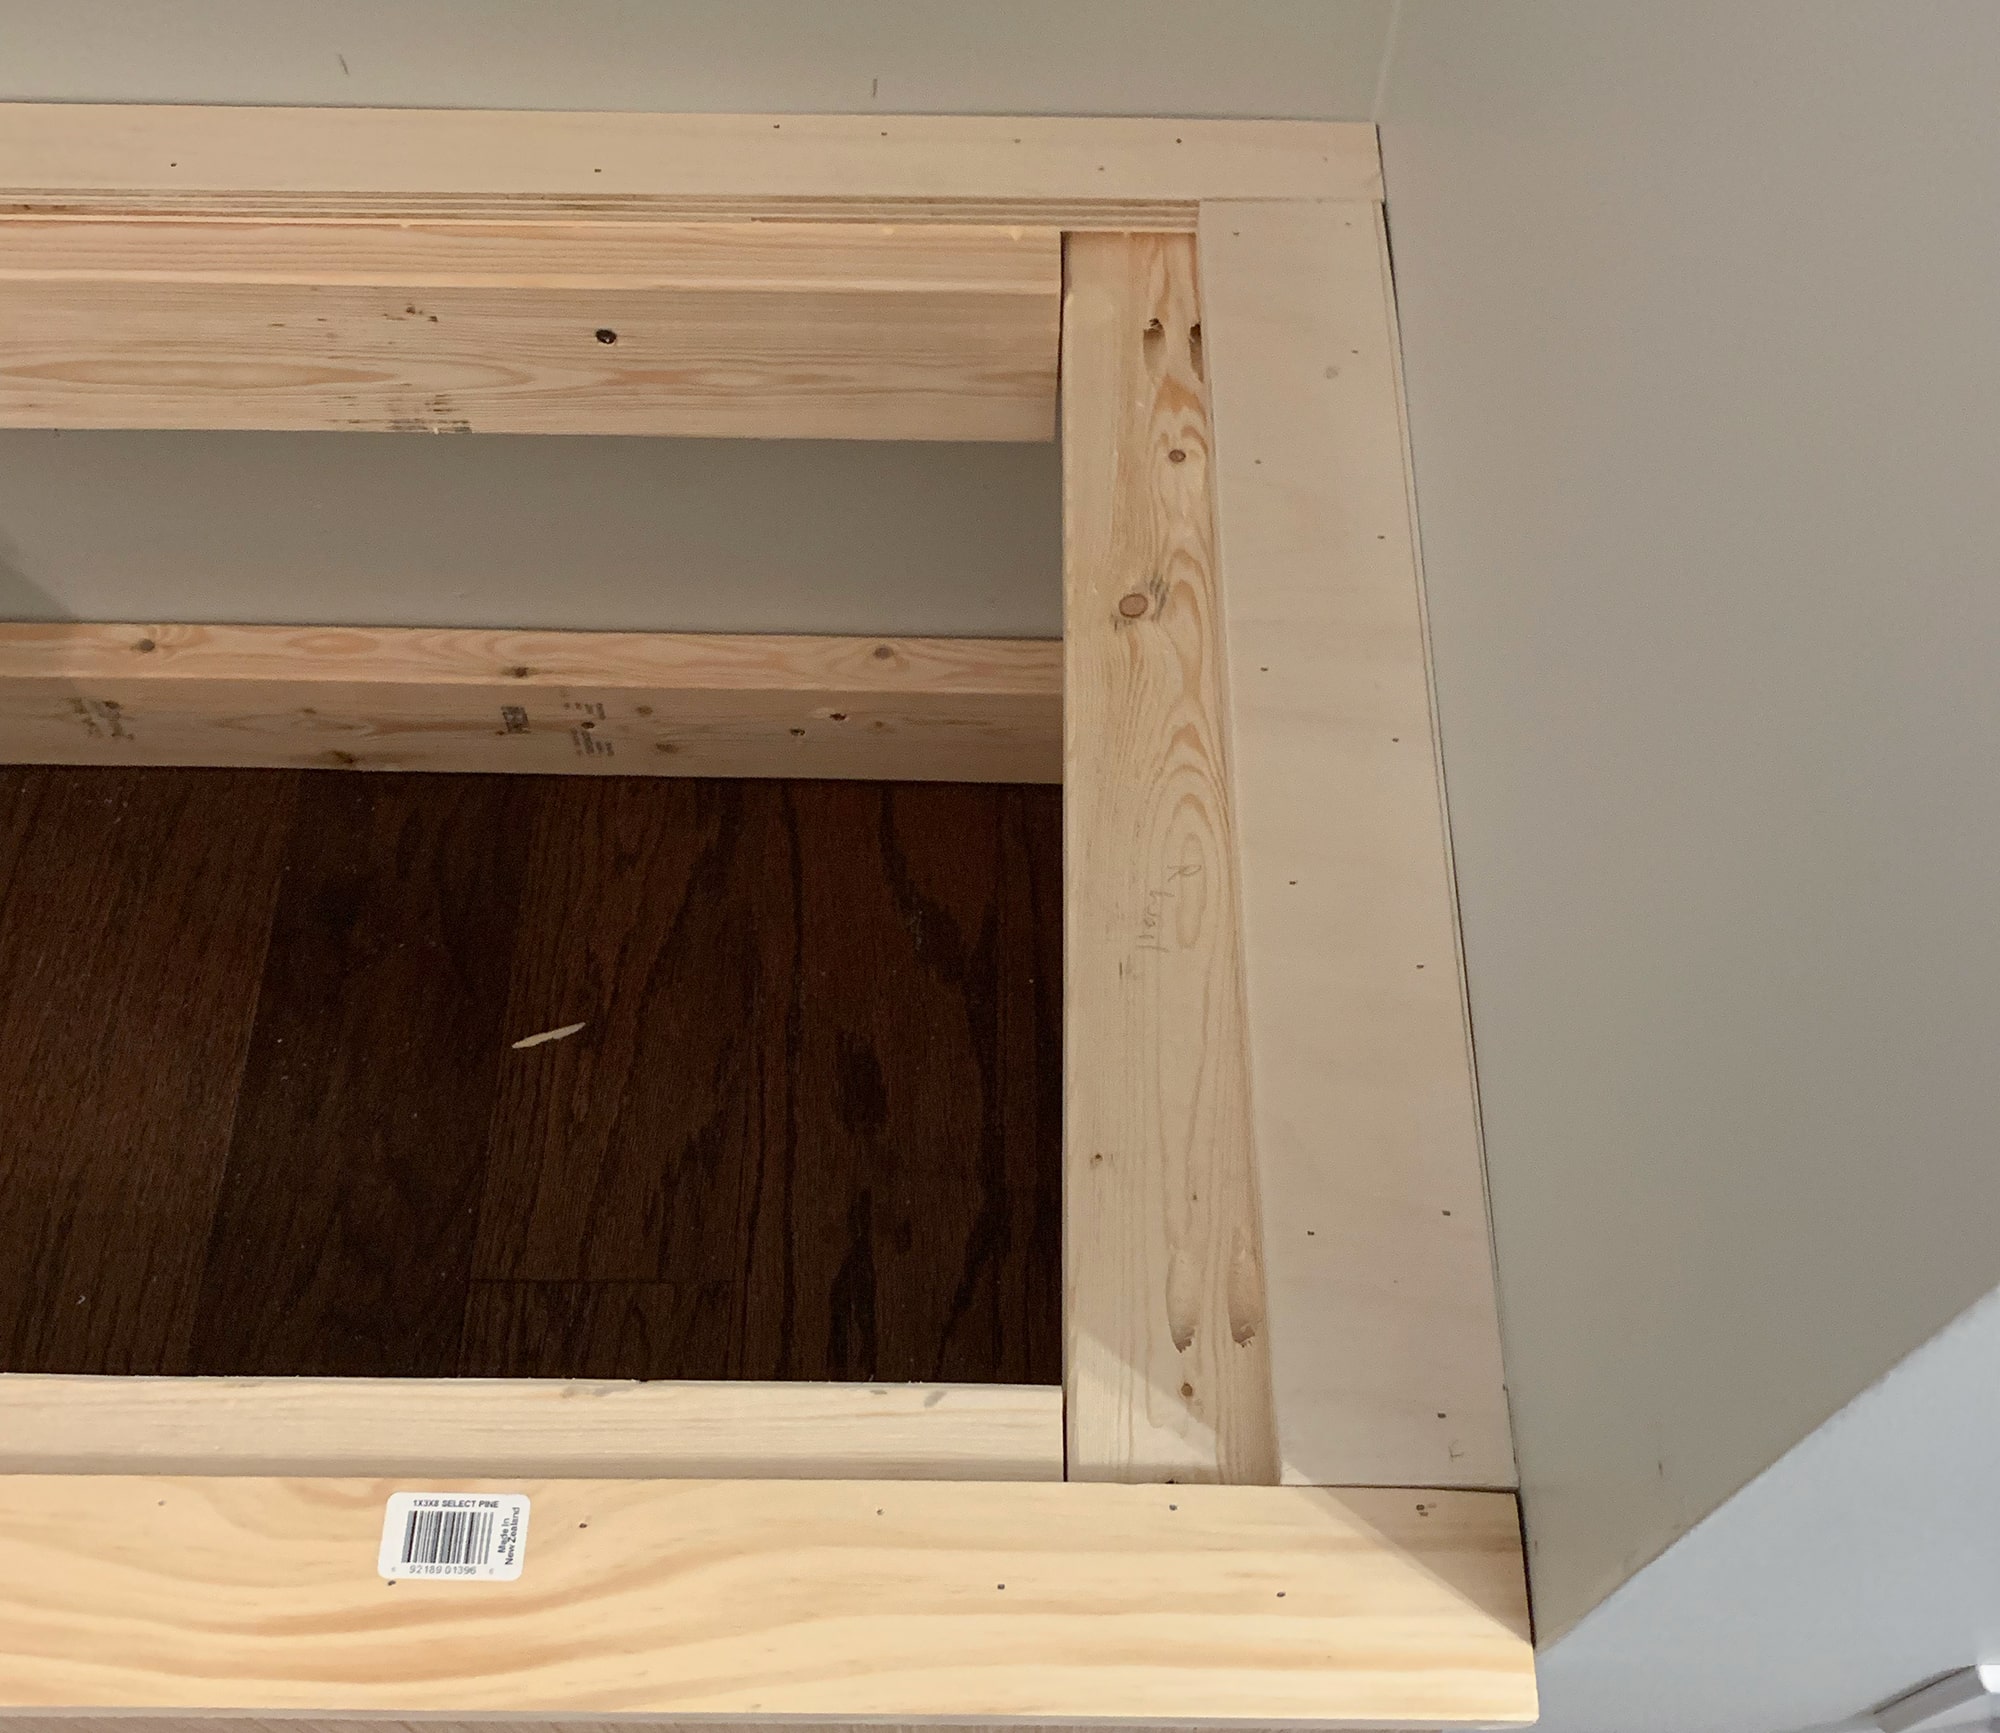
Footstep iii – Build Front end Construction Supports for Window Seat
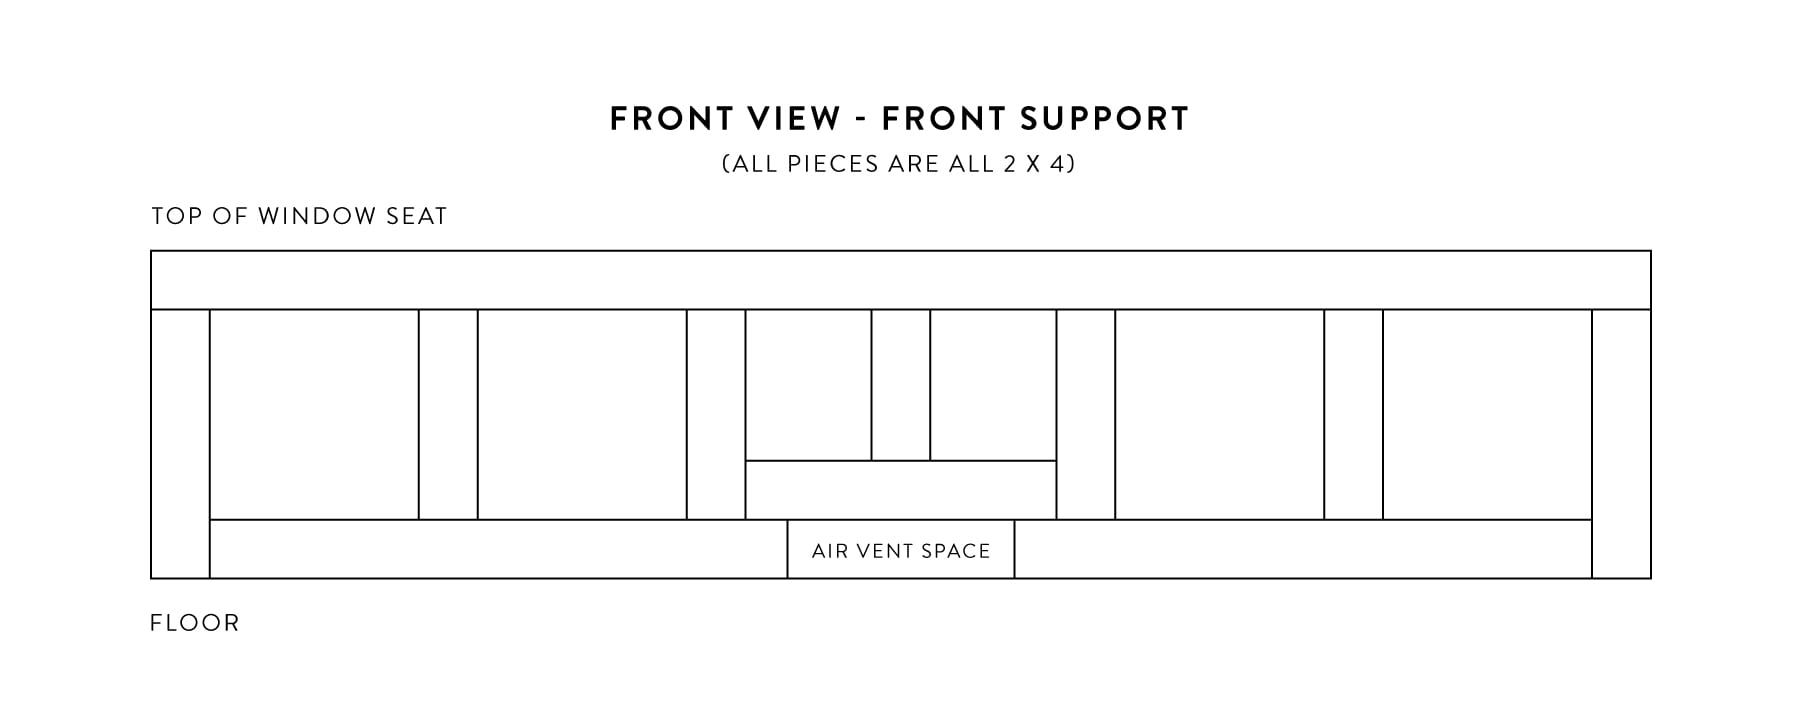
This is where you lot'll need the Kreg Jig! To make things easier and to cut downwards on time, we pre-cutting all our vertical supports for the forepart structure. So, we made all the pocket holes in each vertical support. Once we had all the pocket holes created, we attached them to the height, front support board.

We attached them to the top lath Earlier we added it to the rest of the window seat structure. This way, it made it easier to attach all vertical supports to the bottom lath, without having to squeeze in each vertical board between the summit and bottom front supports.
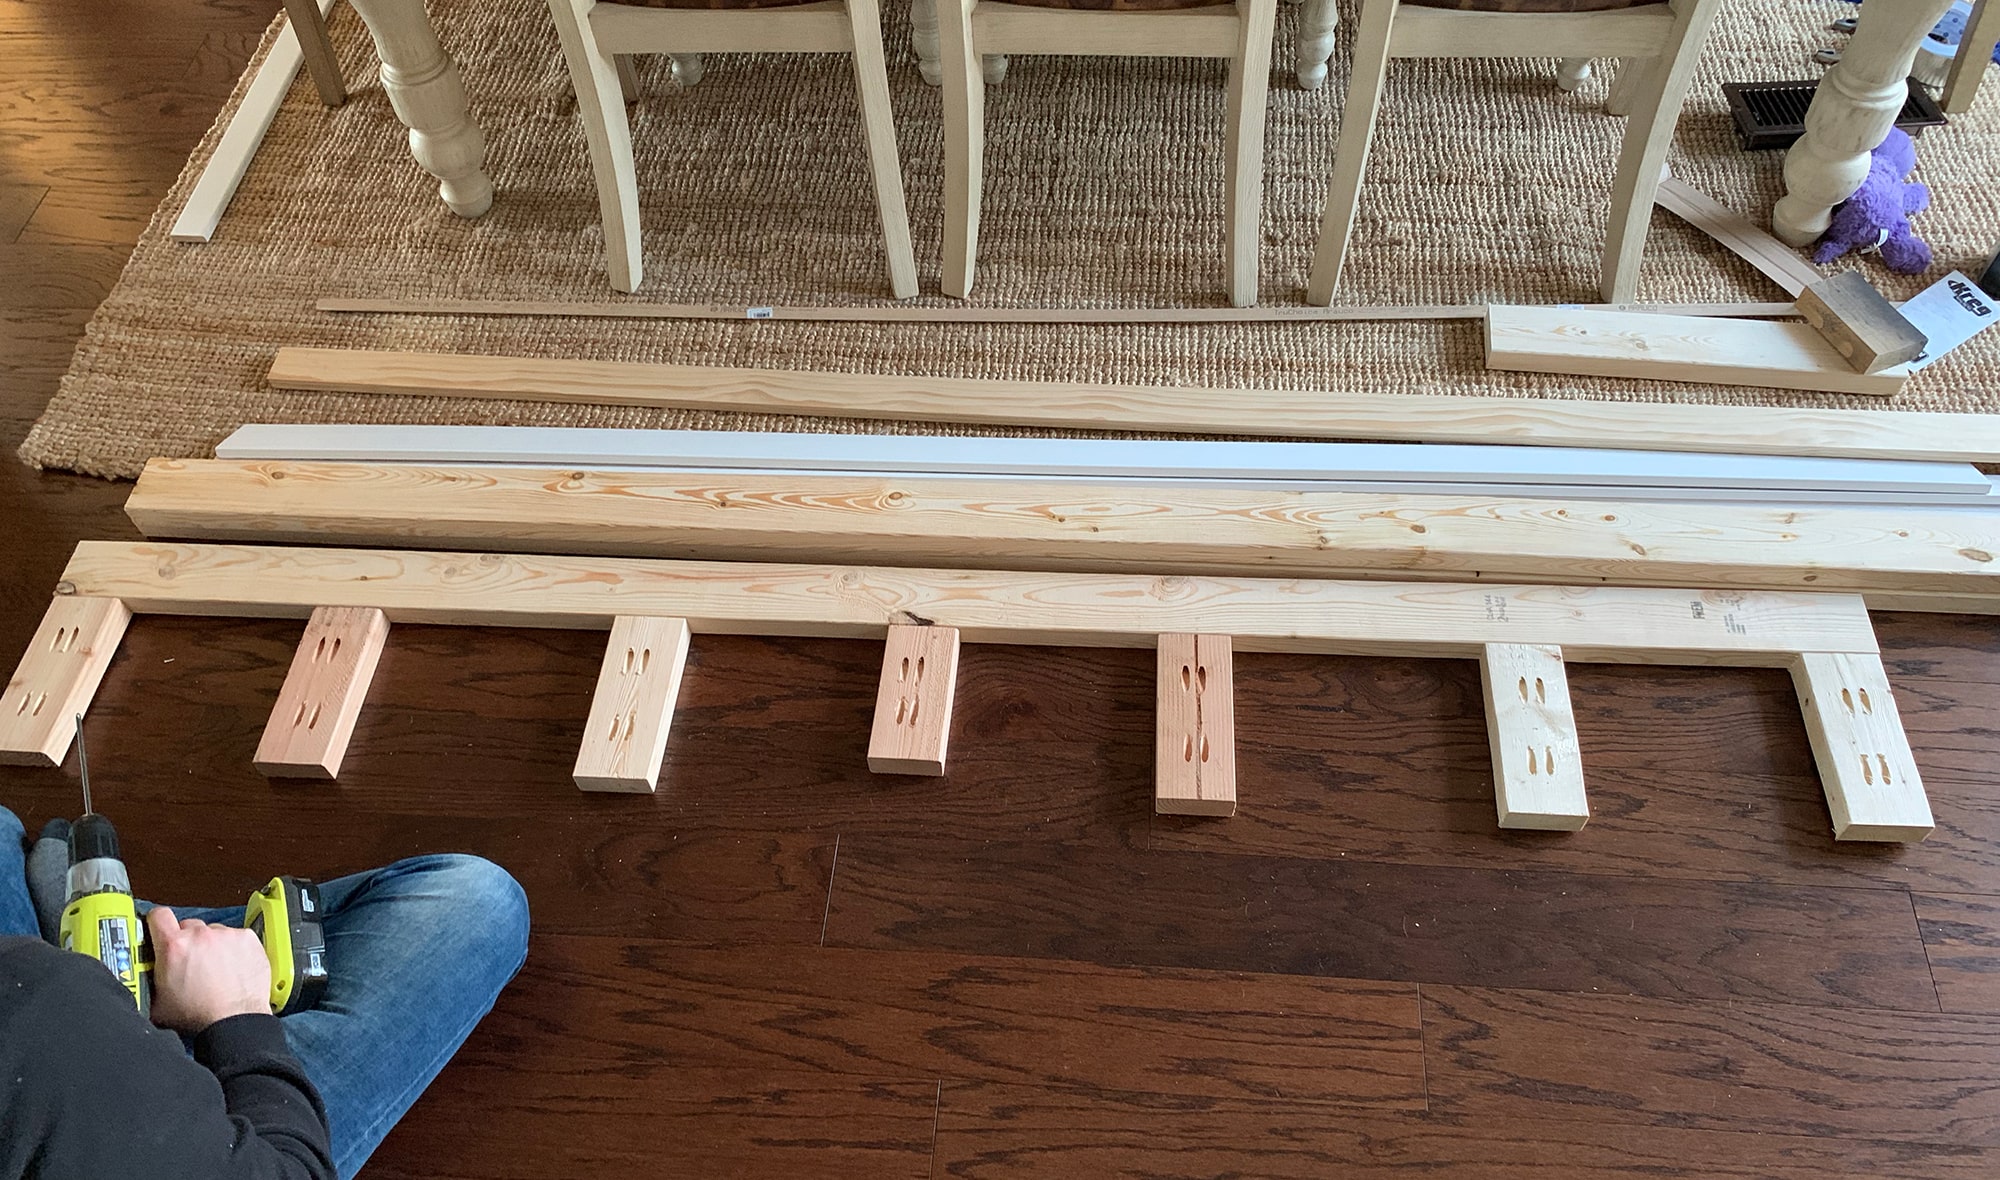
Afterward we attached all the vertical supports to the top cross back up, we then took this unabridged piece and attached all the vertical supports to the bottom floor support.
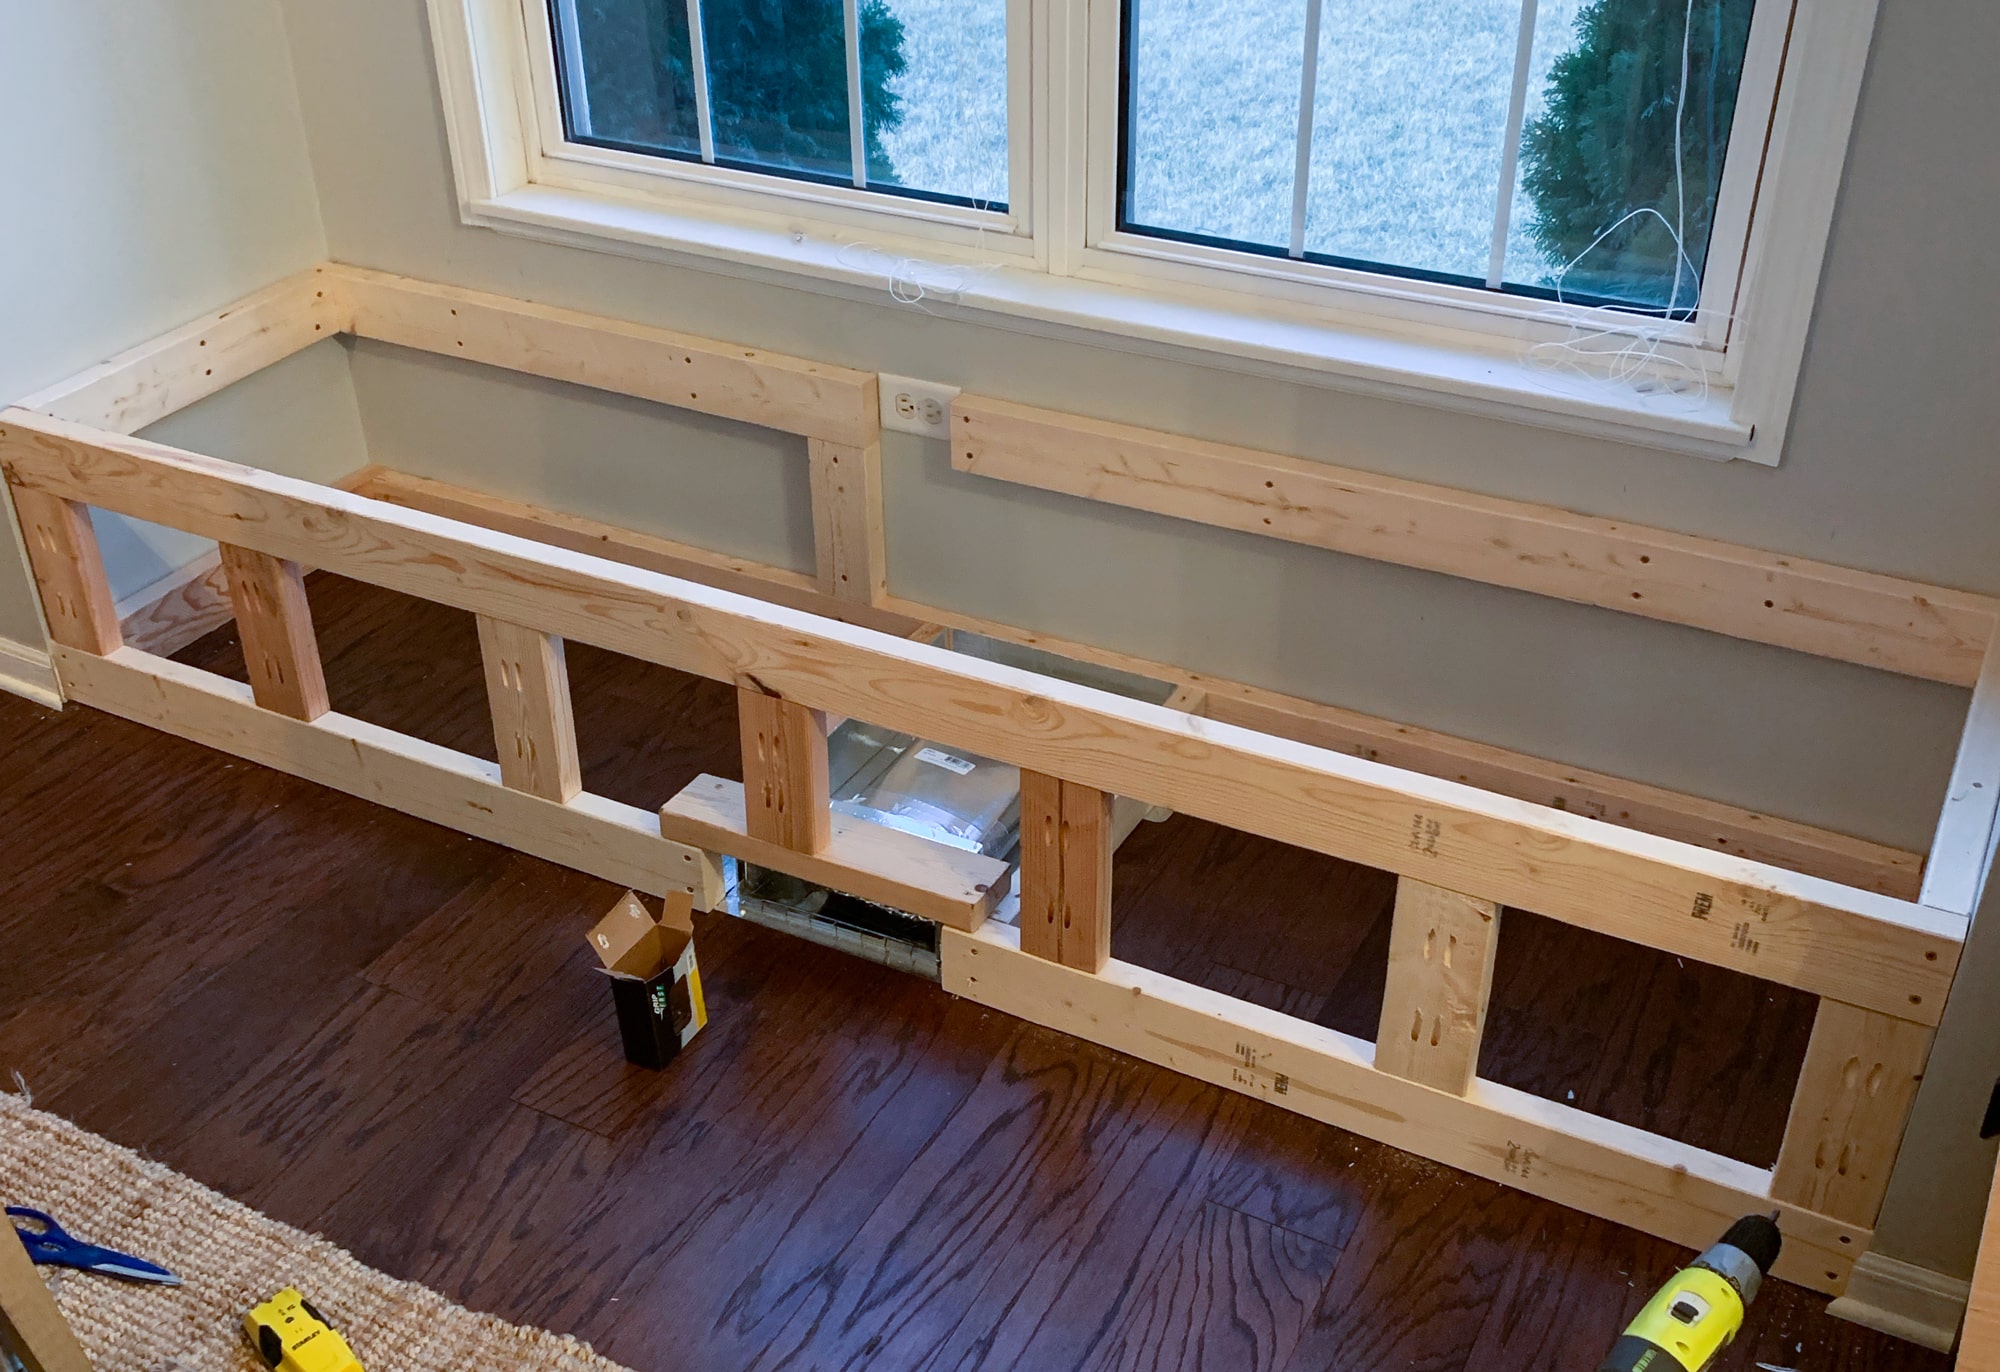
We had the pocket holes face the front end of the support to brand it easier to drill the screws into each board. Plus, this will be covered with the i/8″ plywood face up, then they will be subconscious anyways.
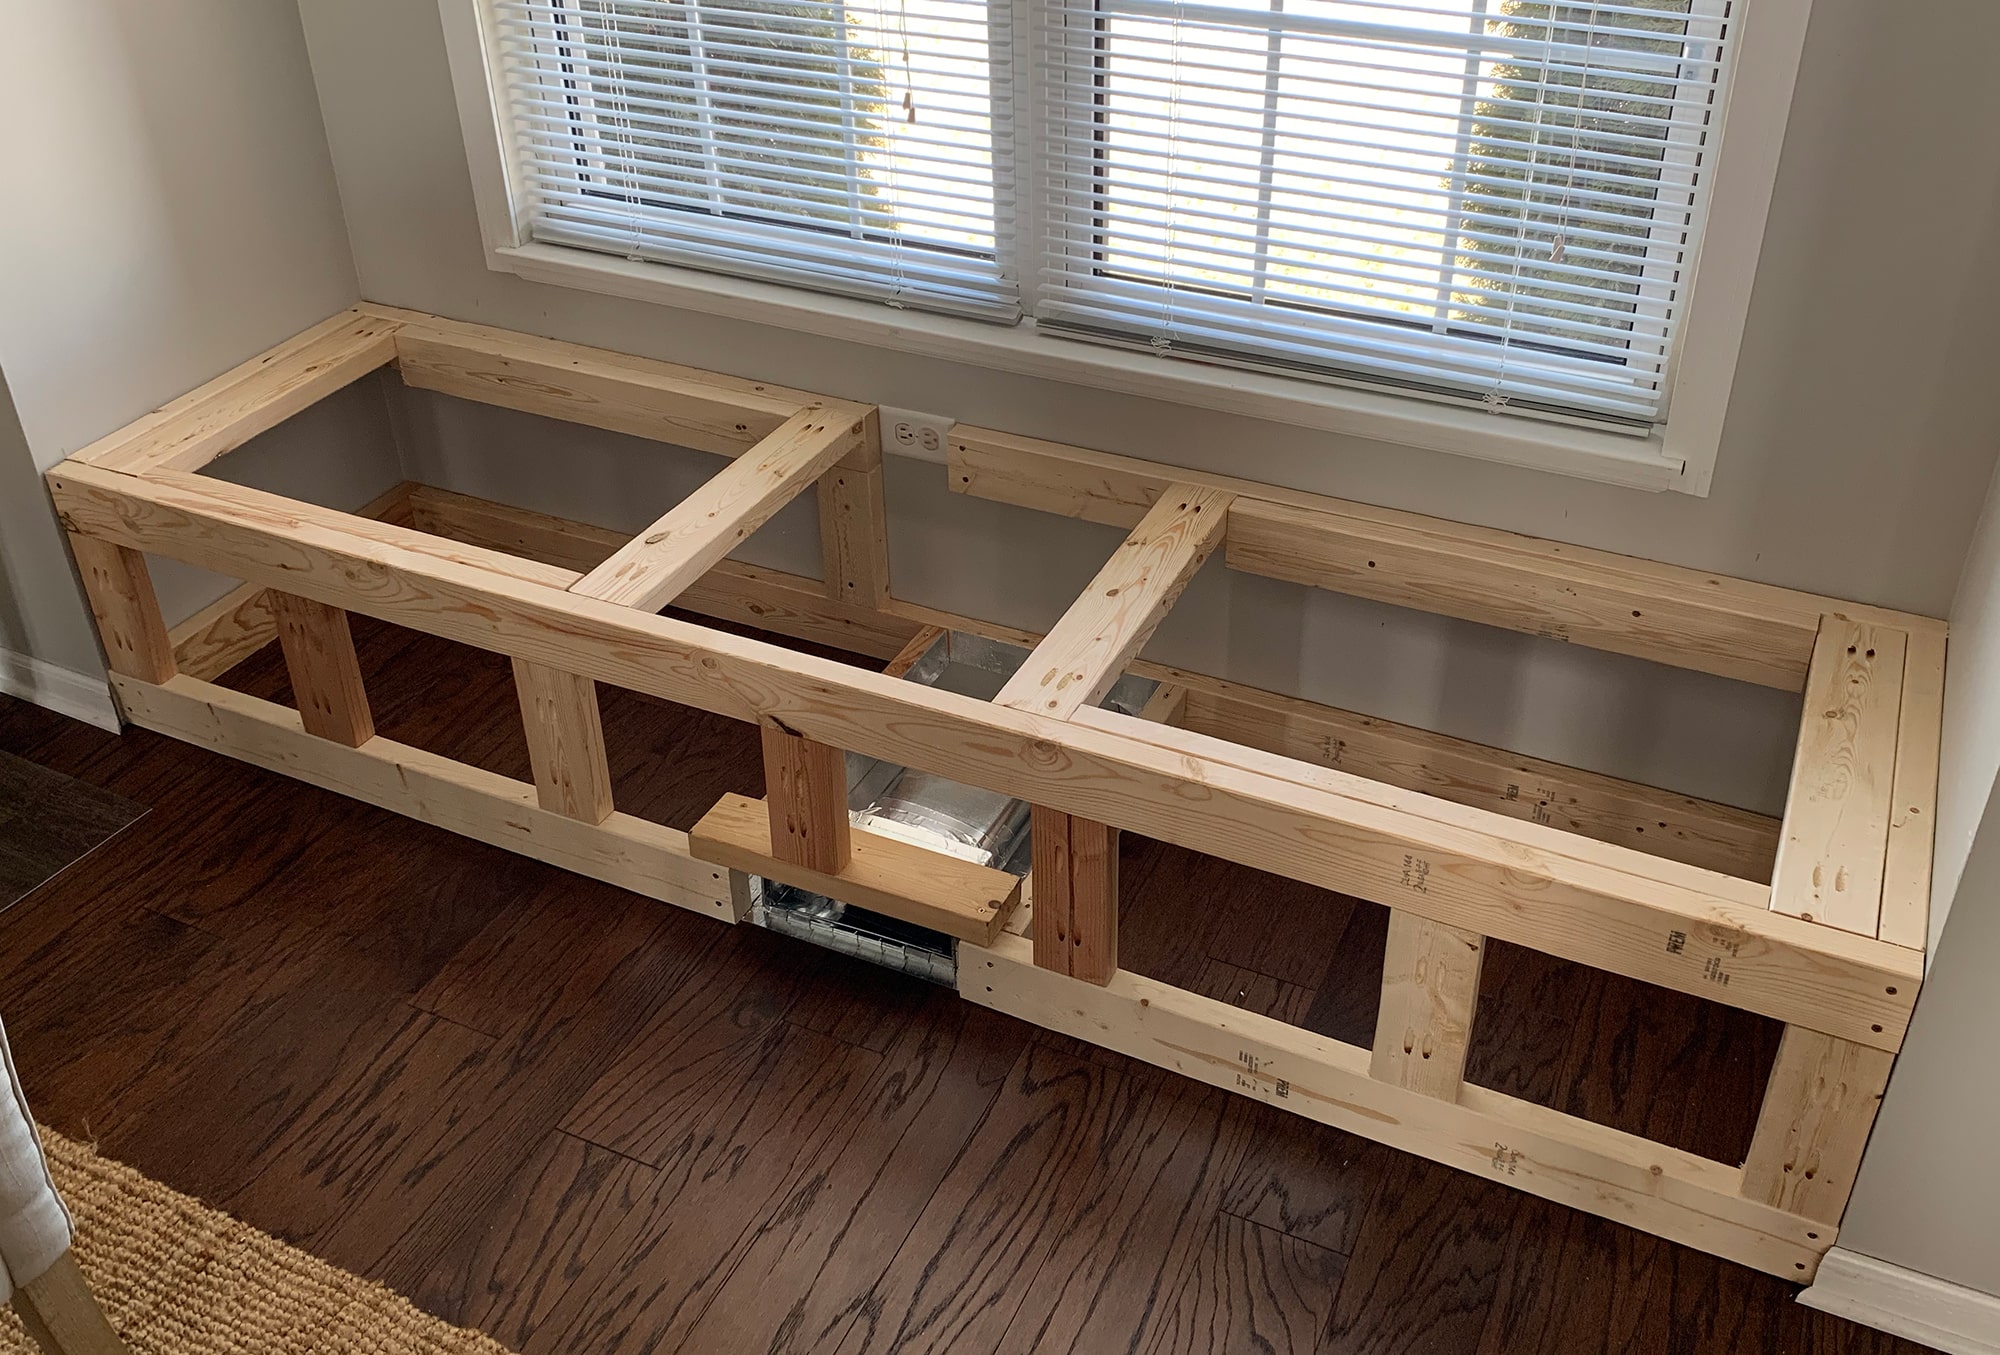
STEP 4 – Add Pinnacle Structure Supports
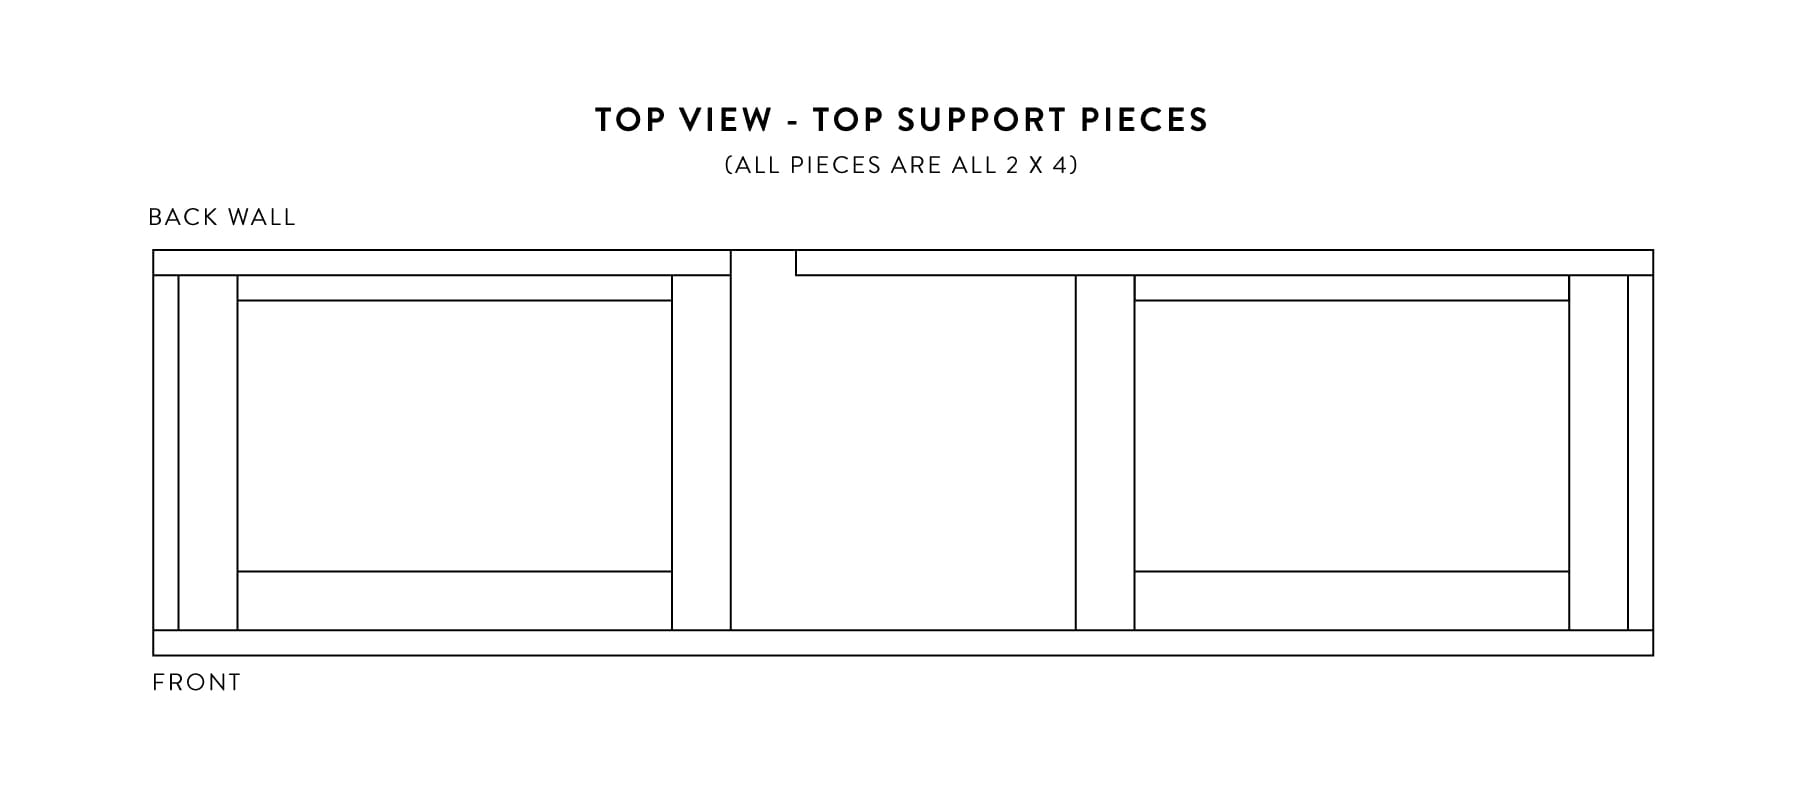
Since we added hidden storage using pianoforte hinges, we needed to add additional cross support pieces, so the subconscious "doors" have something to sit on. In doing and then, we added additional cross supports to both the front and dorsum sides of the window seat for each door.
Also, don't forget we have the air vent. Because of the air vent, the heart portion of the window seat volition be boxed in, and will non take any subconscious storage. We did not add together any additional supports in that department since it's not needed.
When attaching the cantankerous supports from the front end to the back of the window seat, you'll need to create pocket holes for each of those as well.
There you have it! All the non-so-fun part of the build is complete. Now, onto the finishing pieces 🙂
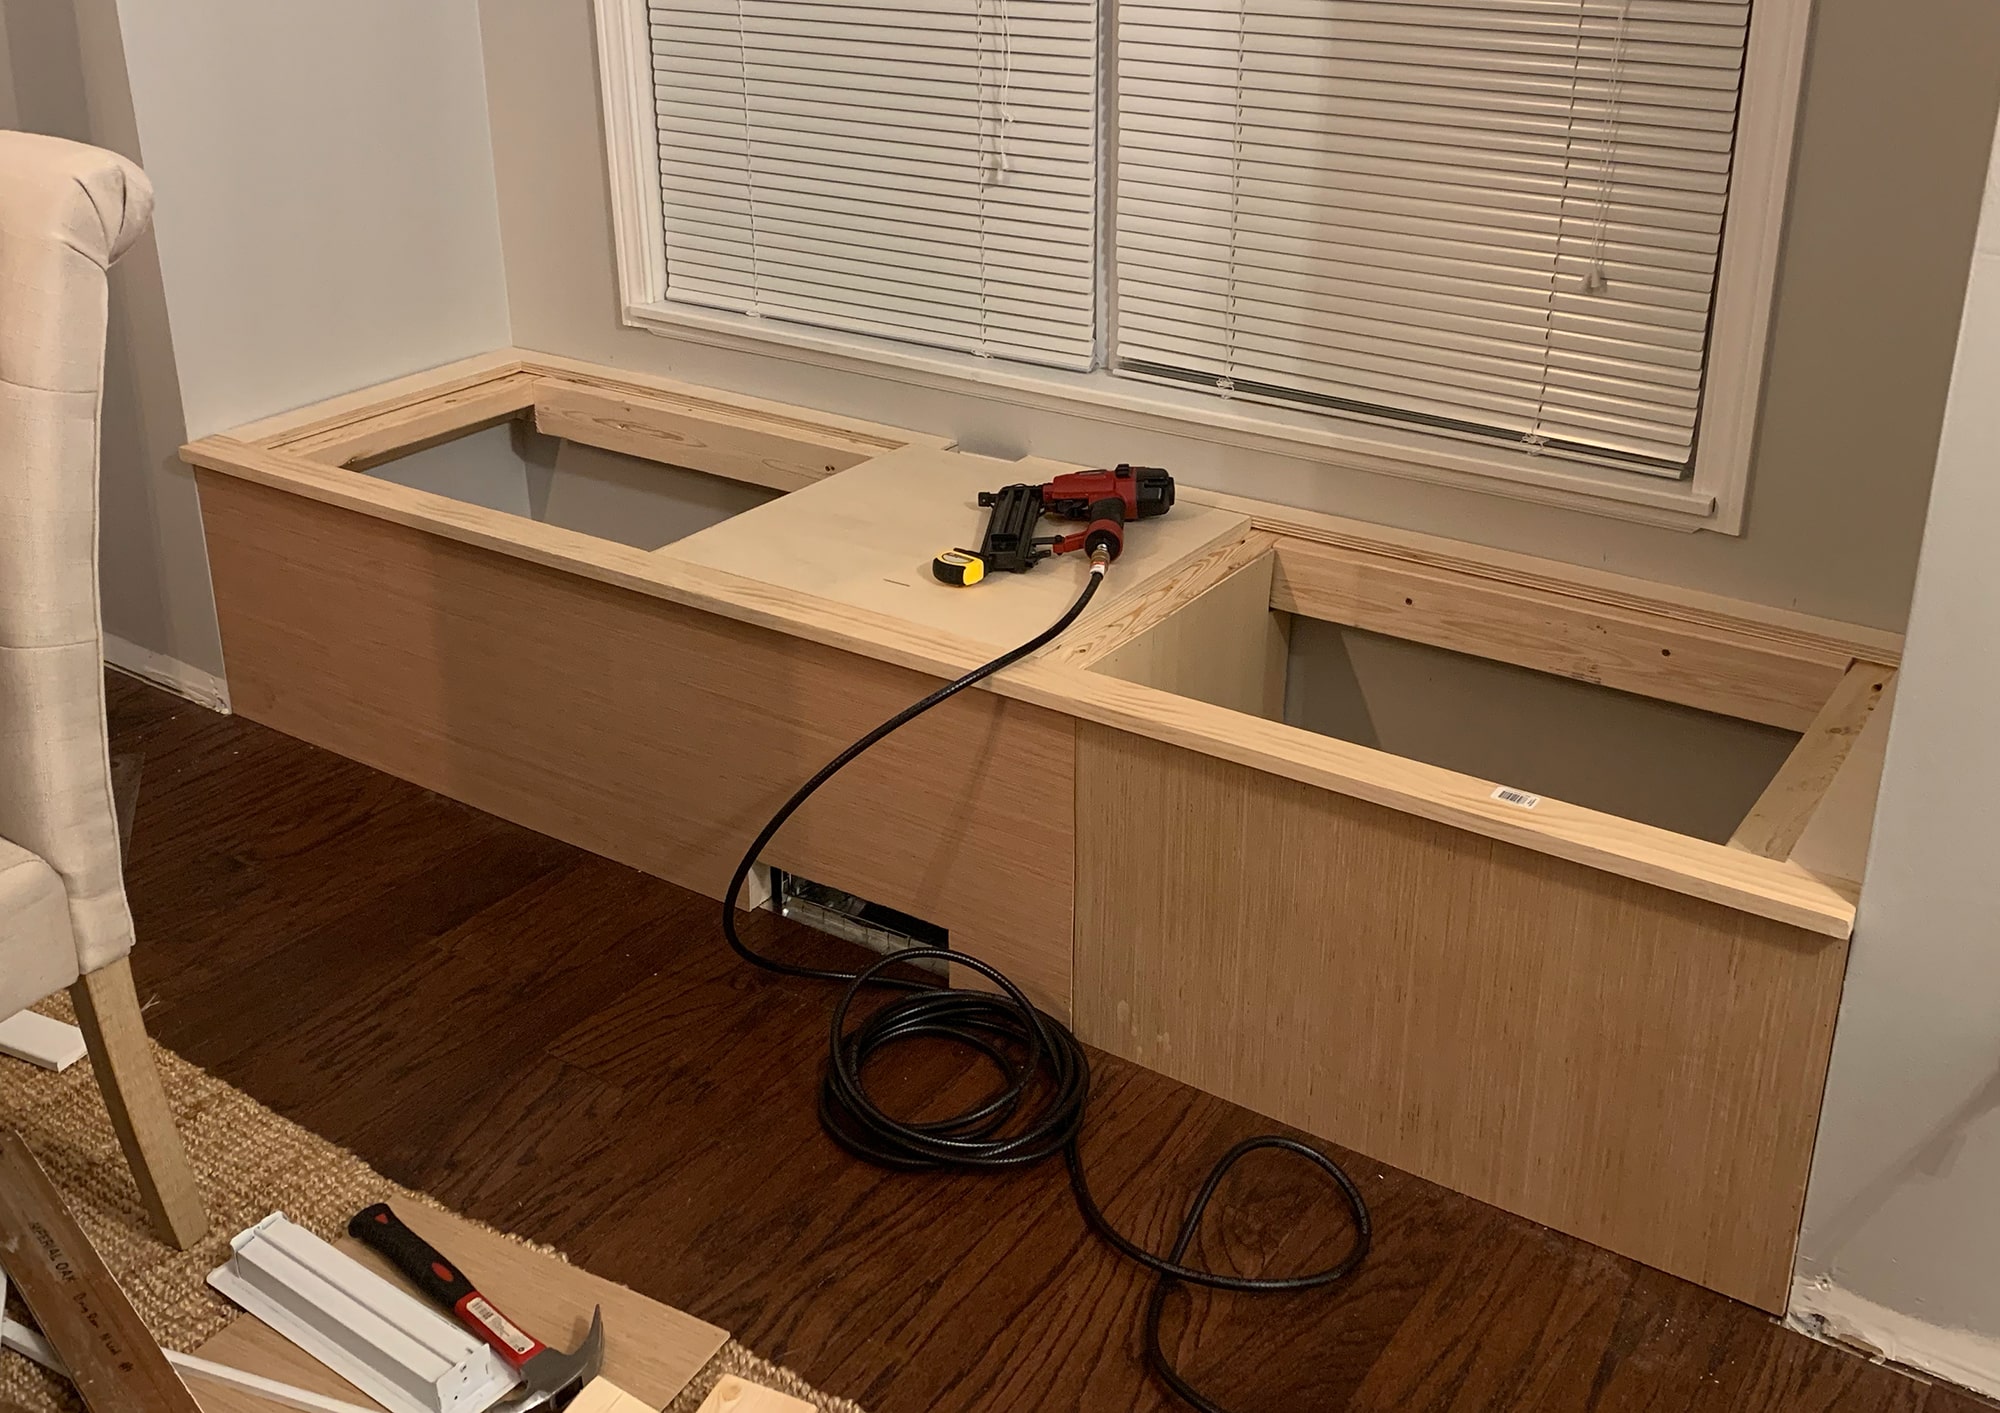
Edifice The Top Seat & Hidden Storage Doors
This is the tricky role of the whole build. It's like 1 giant puzzle piece, that you cutting into pieces, and and so have to fit the pieces back together 😂.
For tools, you'll need a circular saw, or table saw to rip down the 3/iv″ 10 two x 8 piece of plywood to fit the width and depth of the window seat. You'll demand the pigsty saw to cut out the circle hand hole to elevator upwardly your doors. Also, you lot'll demand your brad nailer to nail downward the outside strip pieces. For united states, we likewise had to nail down the centerpiece that is to a higher place the boxed in air vent section.
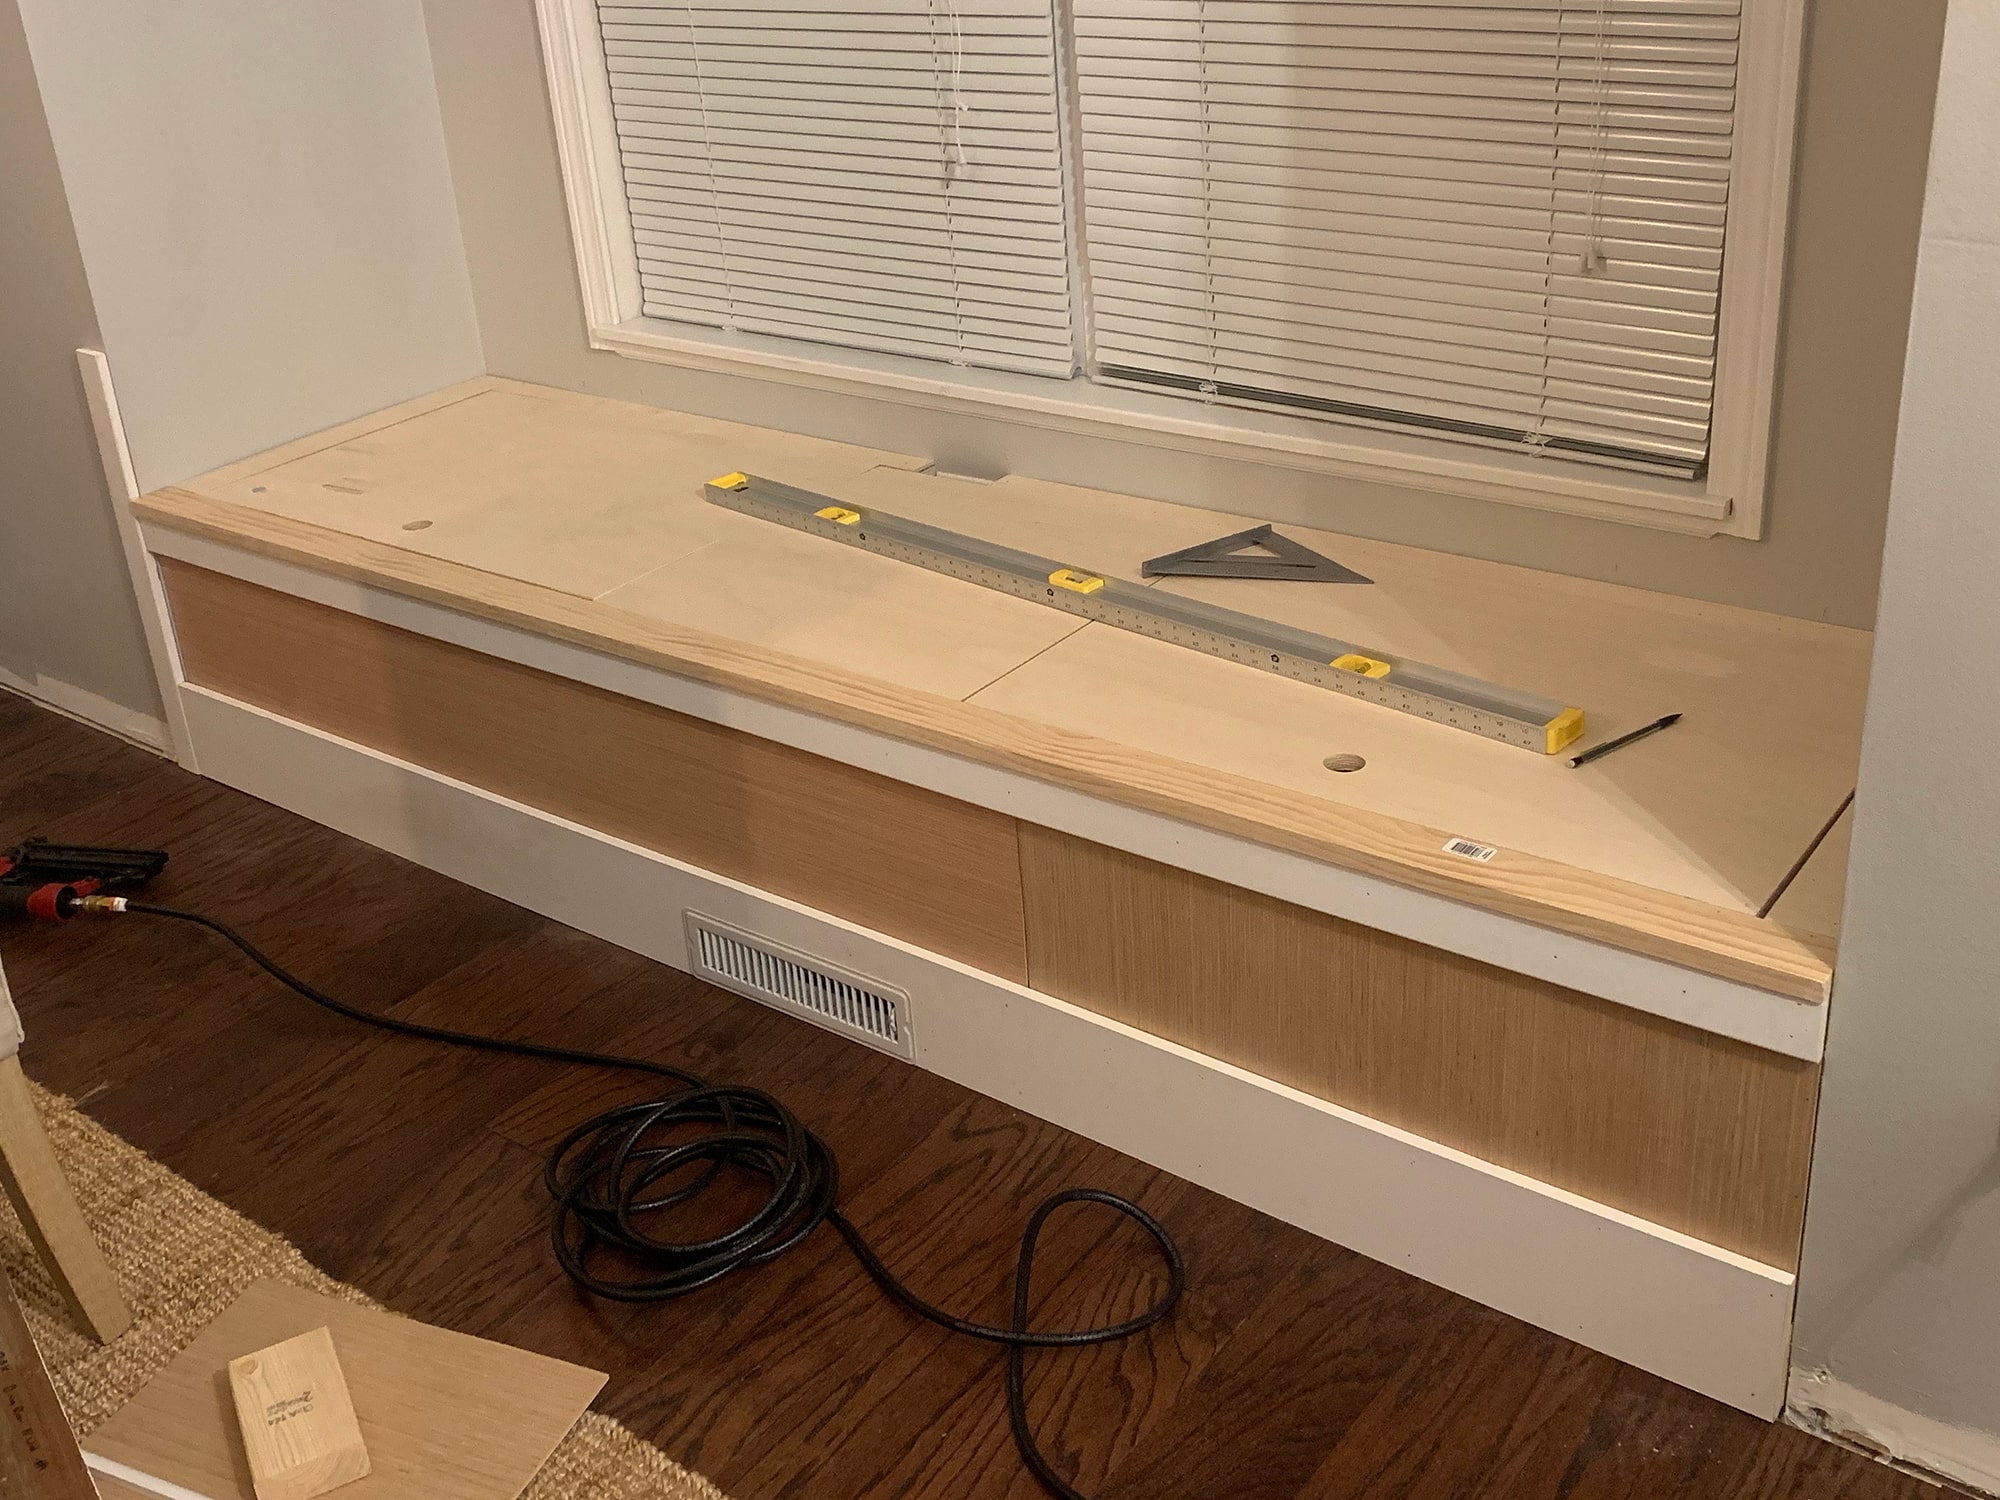
Cutting The Plywood Piece To Fit Window Seat
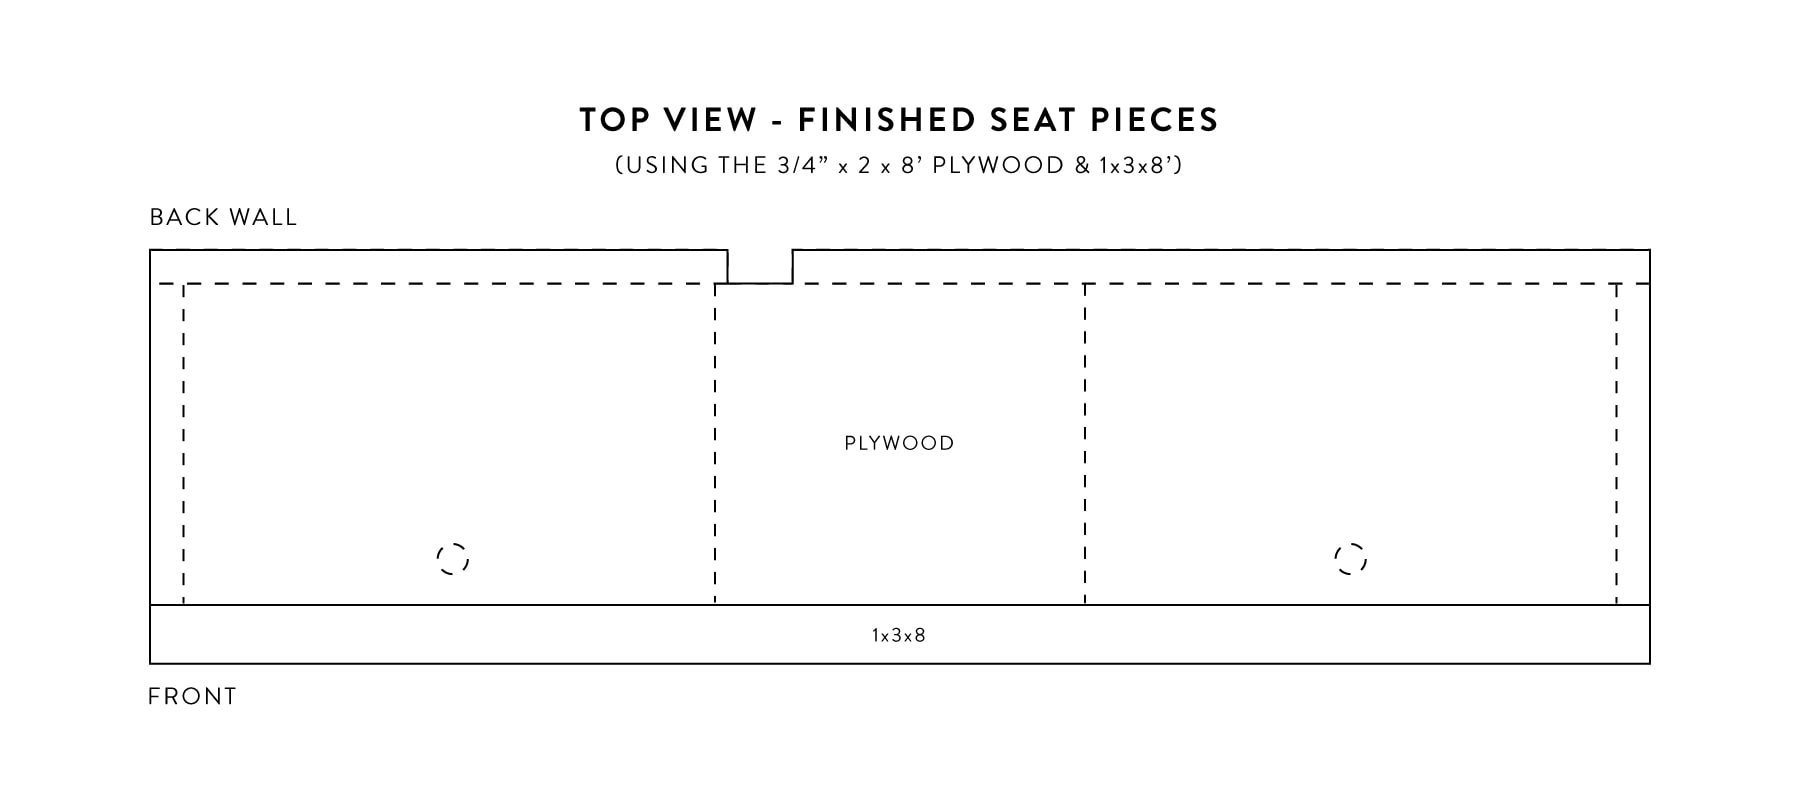
First, offset out by cut down your overall plywood piece to fit your window seat. We added a forepart "lip" (is that what you'd phone call it?) to our seat that sits out a little farther than the window seat surface area (virtually 1/iv″ past the trim)
Of course, our walls were not even Shut to being direct. And so, we had to brand my cuts on each side of the plywood piece at a small angle in club to fit inside the window seat.
Cut The Side and Back Strips
One time nosotros cut our master plywood piece cutting down to size, nosotros and then cut the lilliputian strips for both sides of the seat and 1 long strip for the backside of the seat. These strips are for the hidden storage. Since our walls were non straight, I didn't desire the door to open correct next to the wall. Plus, the 2×iv supports are right underneath that, so it's not like nosotros're losing that space for storage.
Cutting Out Doors
Once all the exterior strips are cut, then yous'll accept the residuum of your main piece, and cut out the doors and the stationary middle piece (the air vent area for us).
Helpful tip
You may need to sand down the sides of the doors and then they accept more than room to open up and shut without it being too snug. The blade shaves off 1/8th inch when you lot rip them down, but a little actress room doesn't hurt.
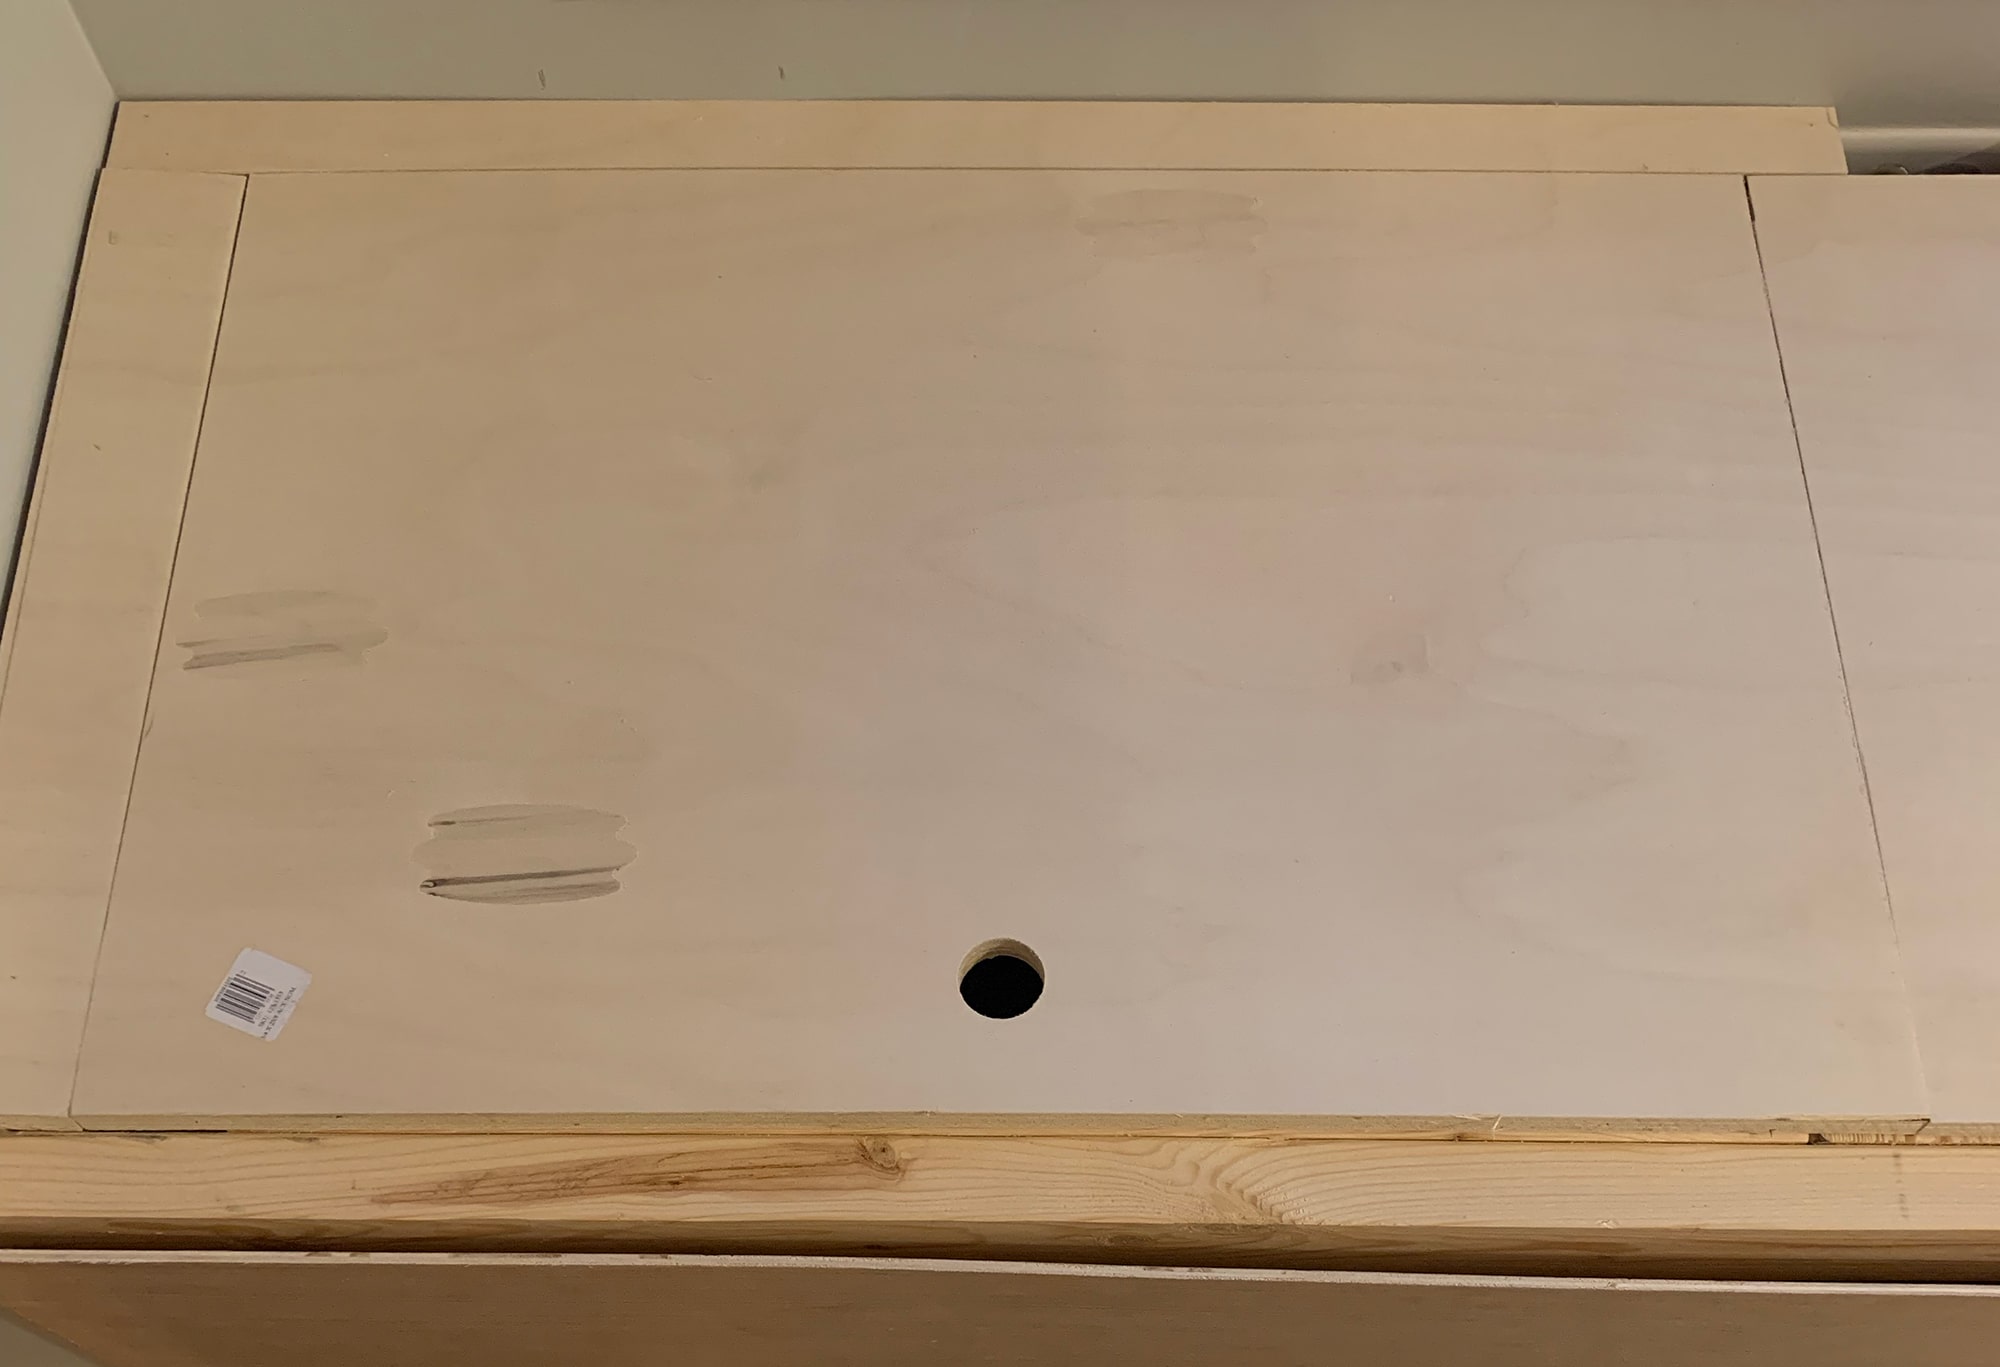
Creating Handles For The Doors
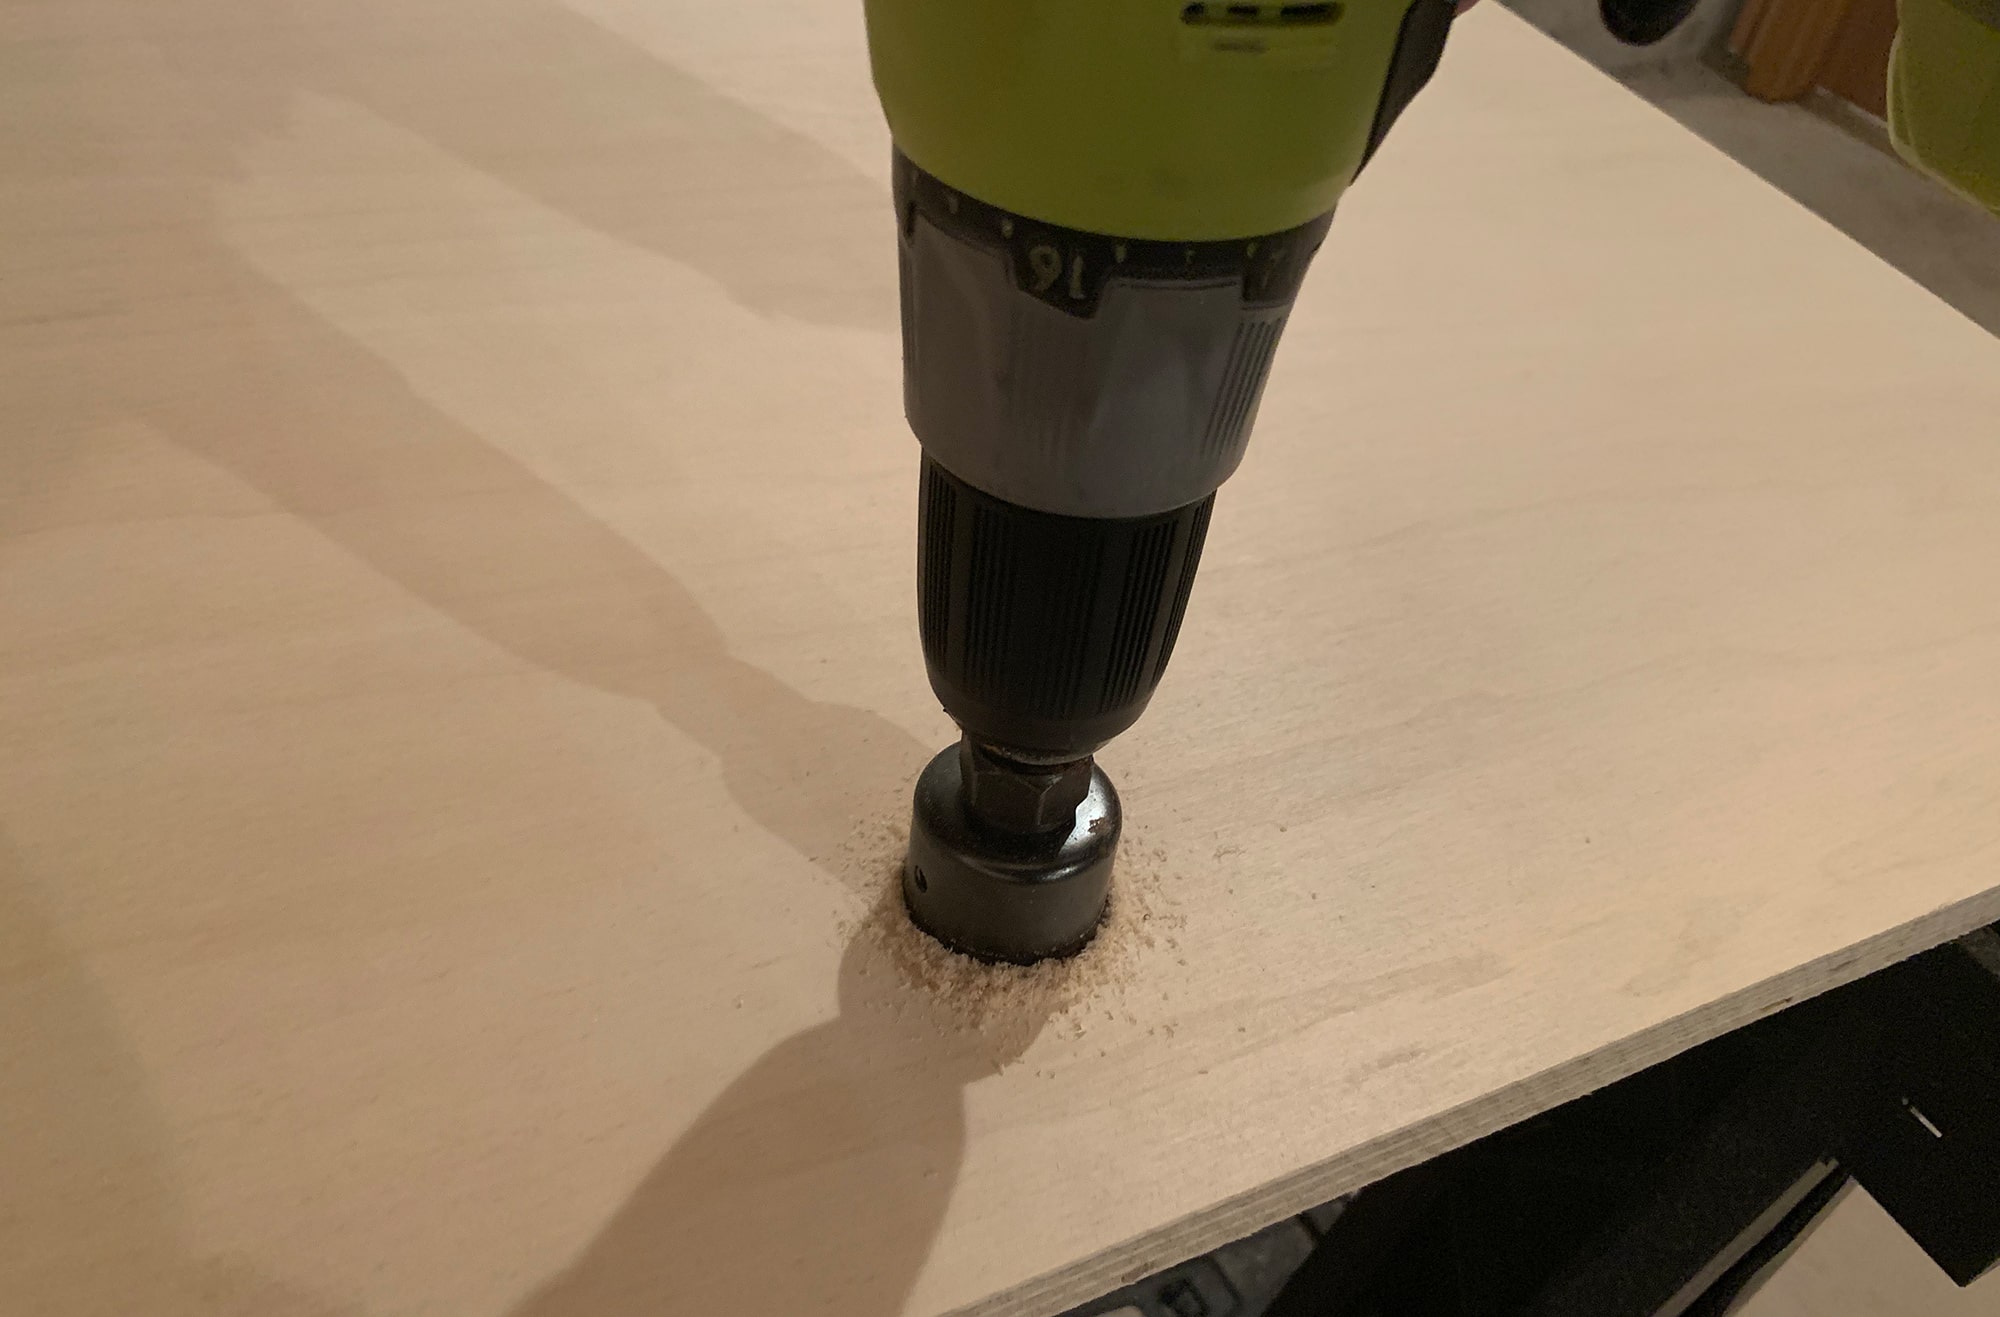
In order to lift upwards the doors, y'all will demand a handle of some sort. Instead of creating a handle that sticks out, we used a hole saw and drilled out a 1 1/2″ circle to apply to lift the door.
You could get extra fancy with this, and make it a longer, rectangular handle using your jigsaw. Just, we like to do things with efficiently effectually hither… a.1000.a. cutting corners if we can ;P
I waited to attach the piano hinges to each door until after we painted everything. I painted the hinges white (with spray paint of course – my favorite matter!) and then they would blend in with the rest of the seat.
Nailing Outer And Middle Pieces
Later everything fits together nicely, then it's time to nail downward all the outer strip pieces, front end lip (1×3) and the stationary middle department. The doors evidently won't be getting nailed down.
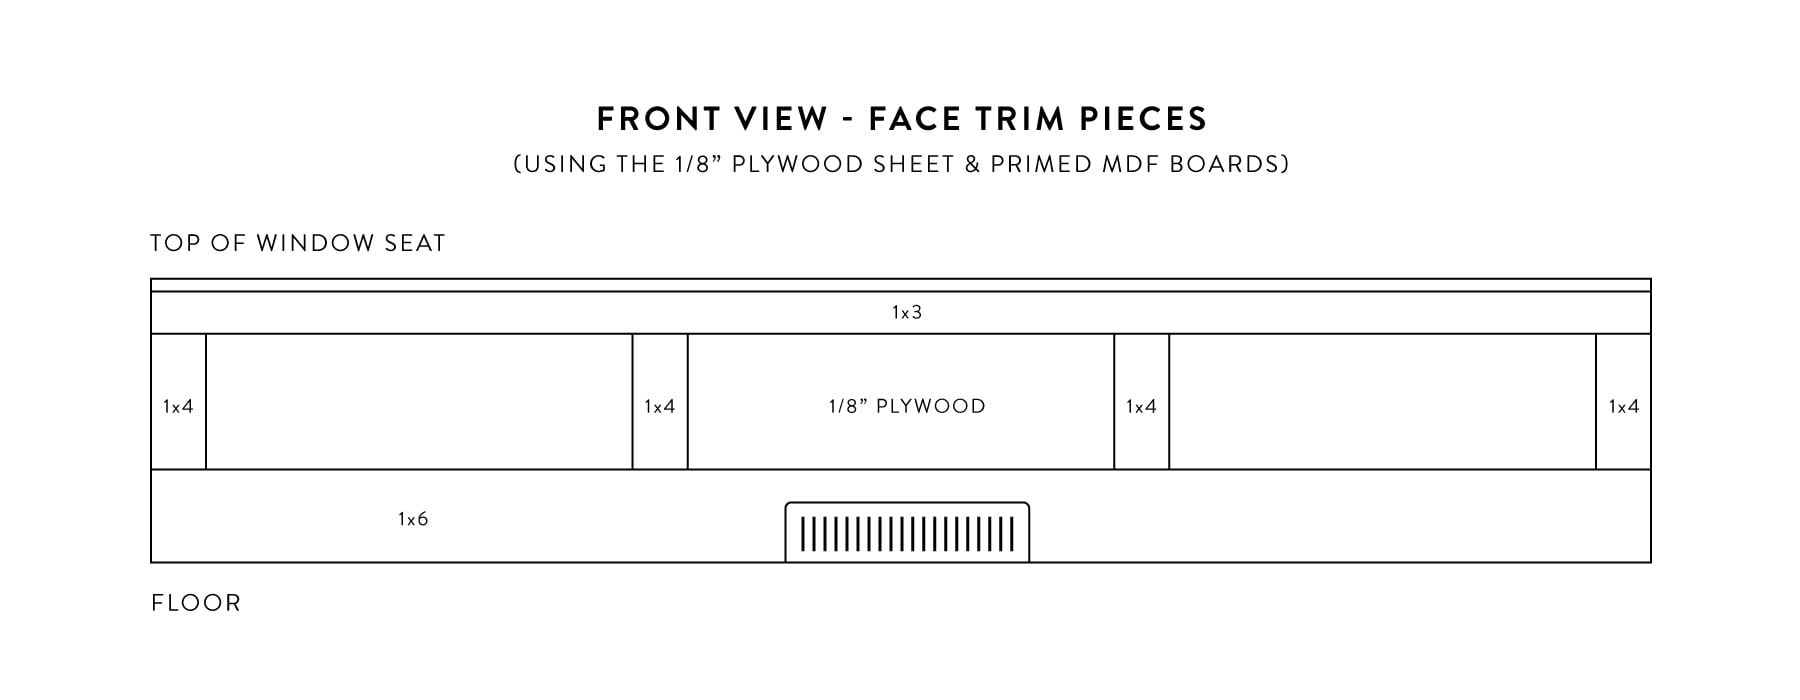
Adding The Final Face Trim
One of my favorite tools is the brad nailer. And so this was definitely the most fun part of this project for me! haha. That beingness said, you lot'll be needed the brad nailer. Again, yous'll need your circular saw or table saw to rip down the plywood sheet. You lot will too need your miter saw to cut all the primed MDF boards.
side note – if you have an air vent every bit nosotros have, you'll also need your jigsaw to cut out the pigsty for that in the plywood sheet.
Cut 1/viii″ Plywood Sail
We had leftover 1/8″ plywood paneling from a previous projection, so we used a couple of pieces for the front end plywood finishing slice. Nosotros just made certain the seem was going to be subconscious by a vertical 1×four trim piece.
If yous're not working with fleck pieces (which you shouldn't if you bought a fresh sheet of 1/eight″ ten 4 x eight plywood!) you'll only cut ane piece to fit the entire front end of the window seat.
As you can see in the above photo, we had to utilise our jigsaw to cut out a pigsty in the plywood for the air vent.
We likewise took boosted flake pieces of the plywood and boxed in the air vent department inside the window seat.
Cutting and Smash All Primed MDF Pieces
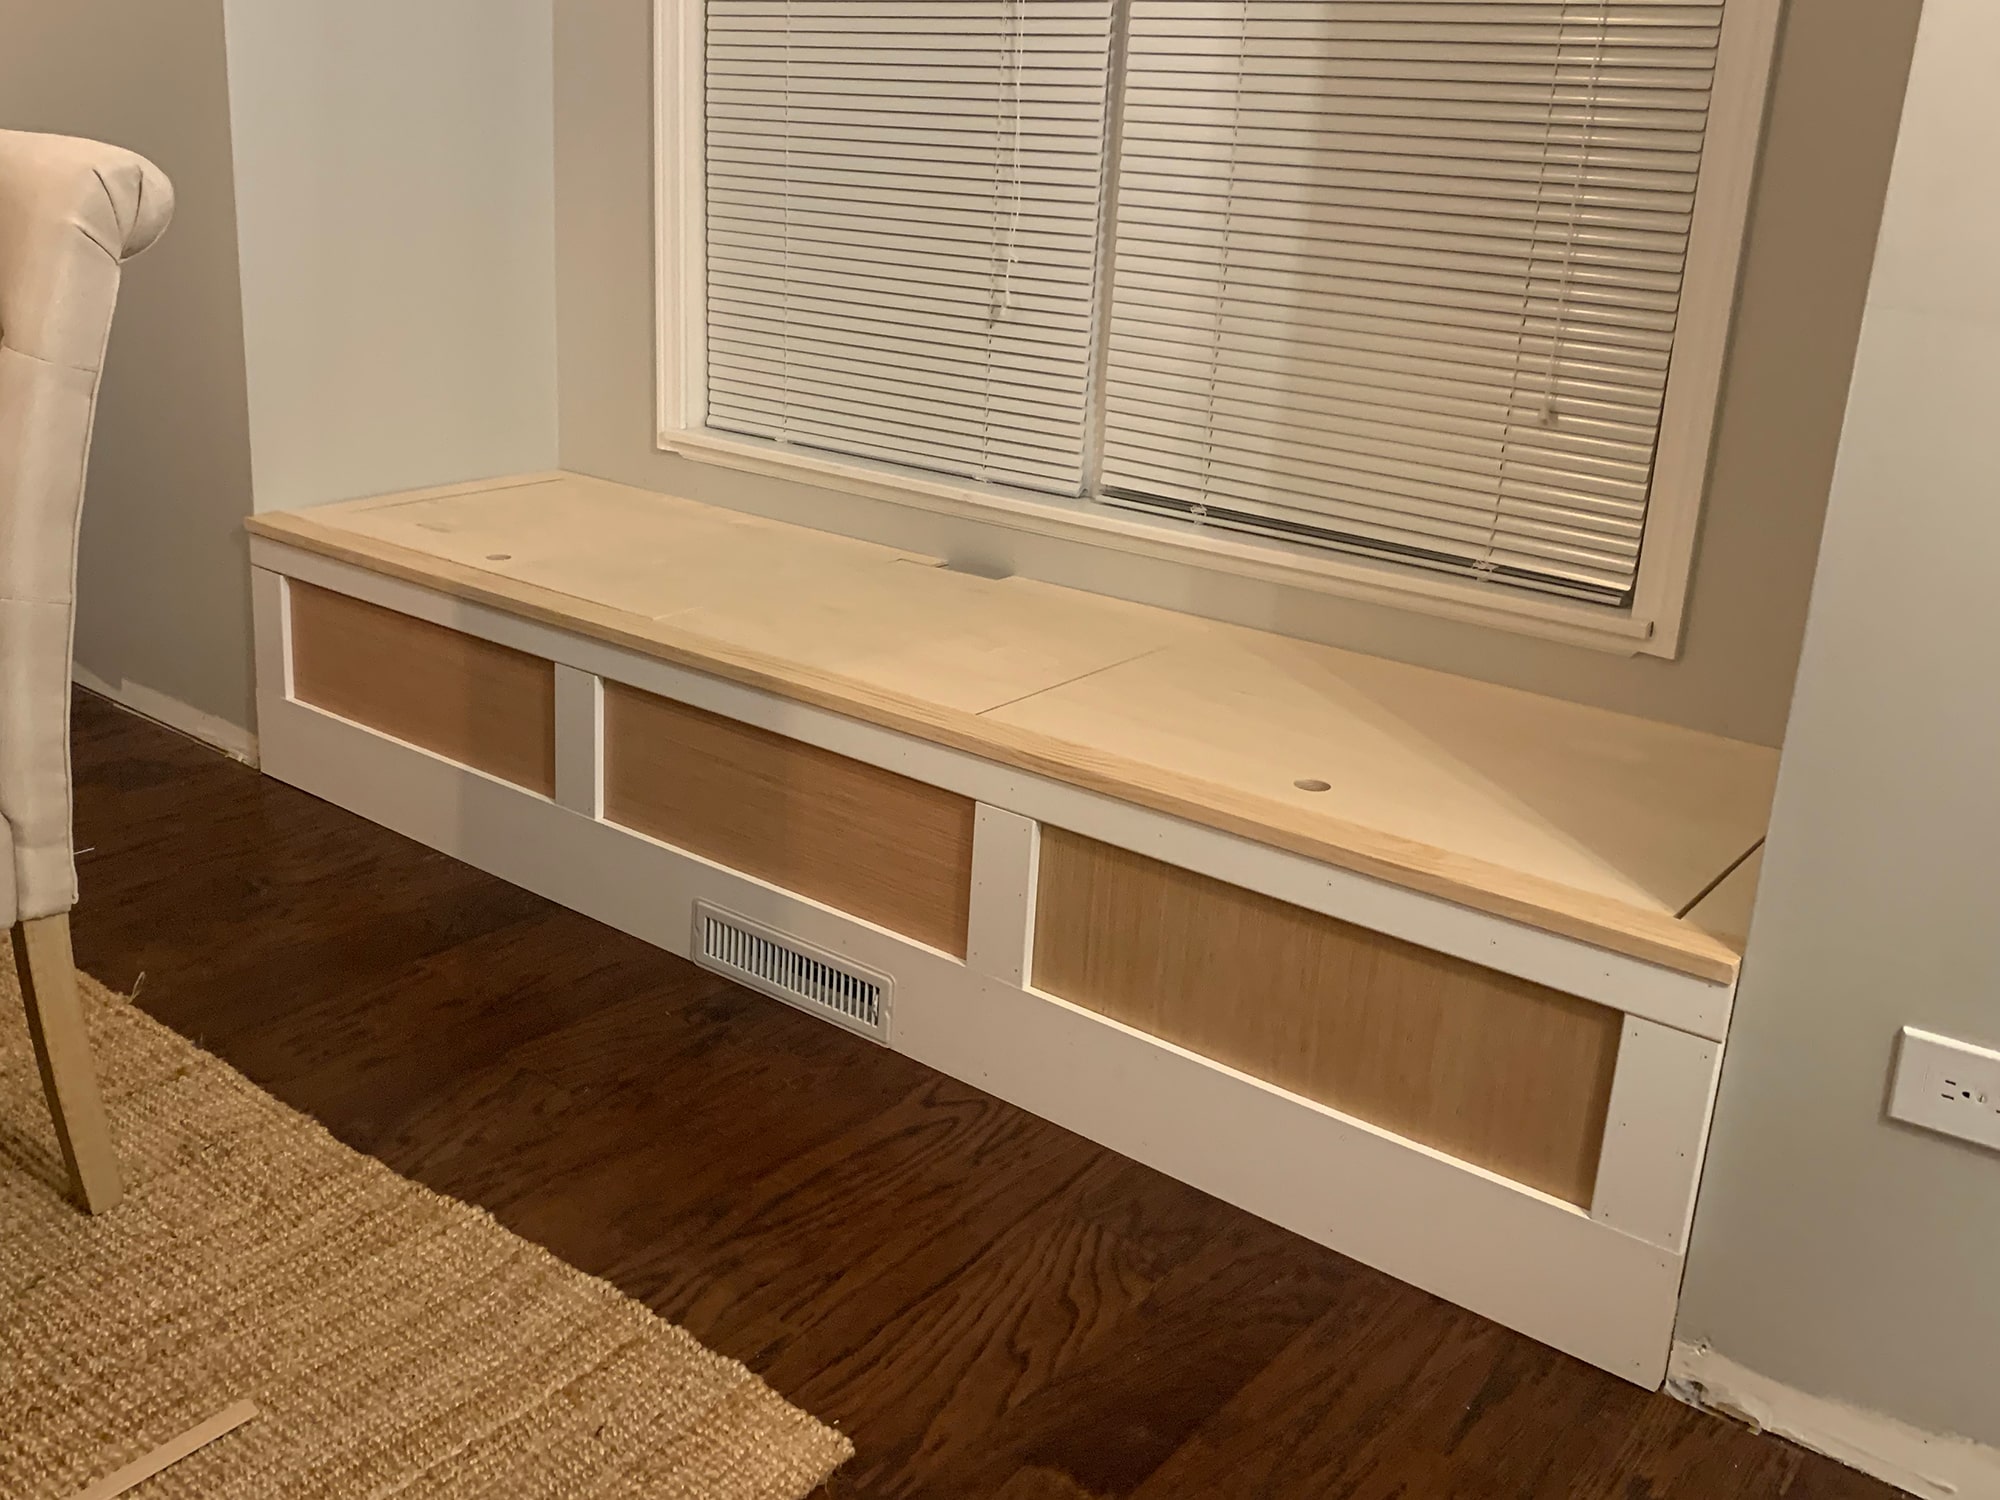
Later on the forepart plywood panel is up, the face trim pieces can be added. Nosotros started by cutting and calculation the top (i×3) and lesser (1×vi) pieces first.
We used our jigsaw again to cut out a hole in the 1×6 for the air vent.
After we had both peak and bottom trim pieces in, nosotros measured the space in between the two pieces to figure out the lengths of the vertical 1x4s. We cut all of these at in one case, and then nailed them evenly spaced onto the window seat.
That'south it! The building function is consummate. All that is left to do is fill nail holes, caulk the trim pieces and and so paint!
Painting, Caulking & Filling In Holes
Before painting, make certain to make full in all the nail holes and caulk around the trim to make sure everything is smooth and seamless. Later that is all done, it'due south time to tape upwardly the area and starting time painting!
Painting, I retrieve will forever be a love-hate relationship for me. I don't mind painting… the kickoff coat. But when I have to get back and practice the second coat, and then information technology just becomes tedious and I'k over information technology 😂.
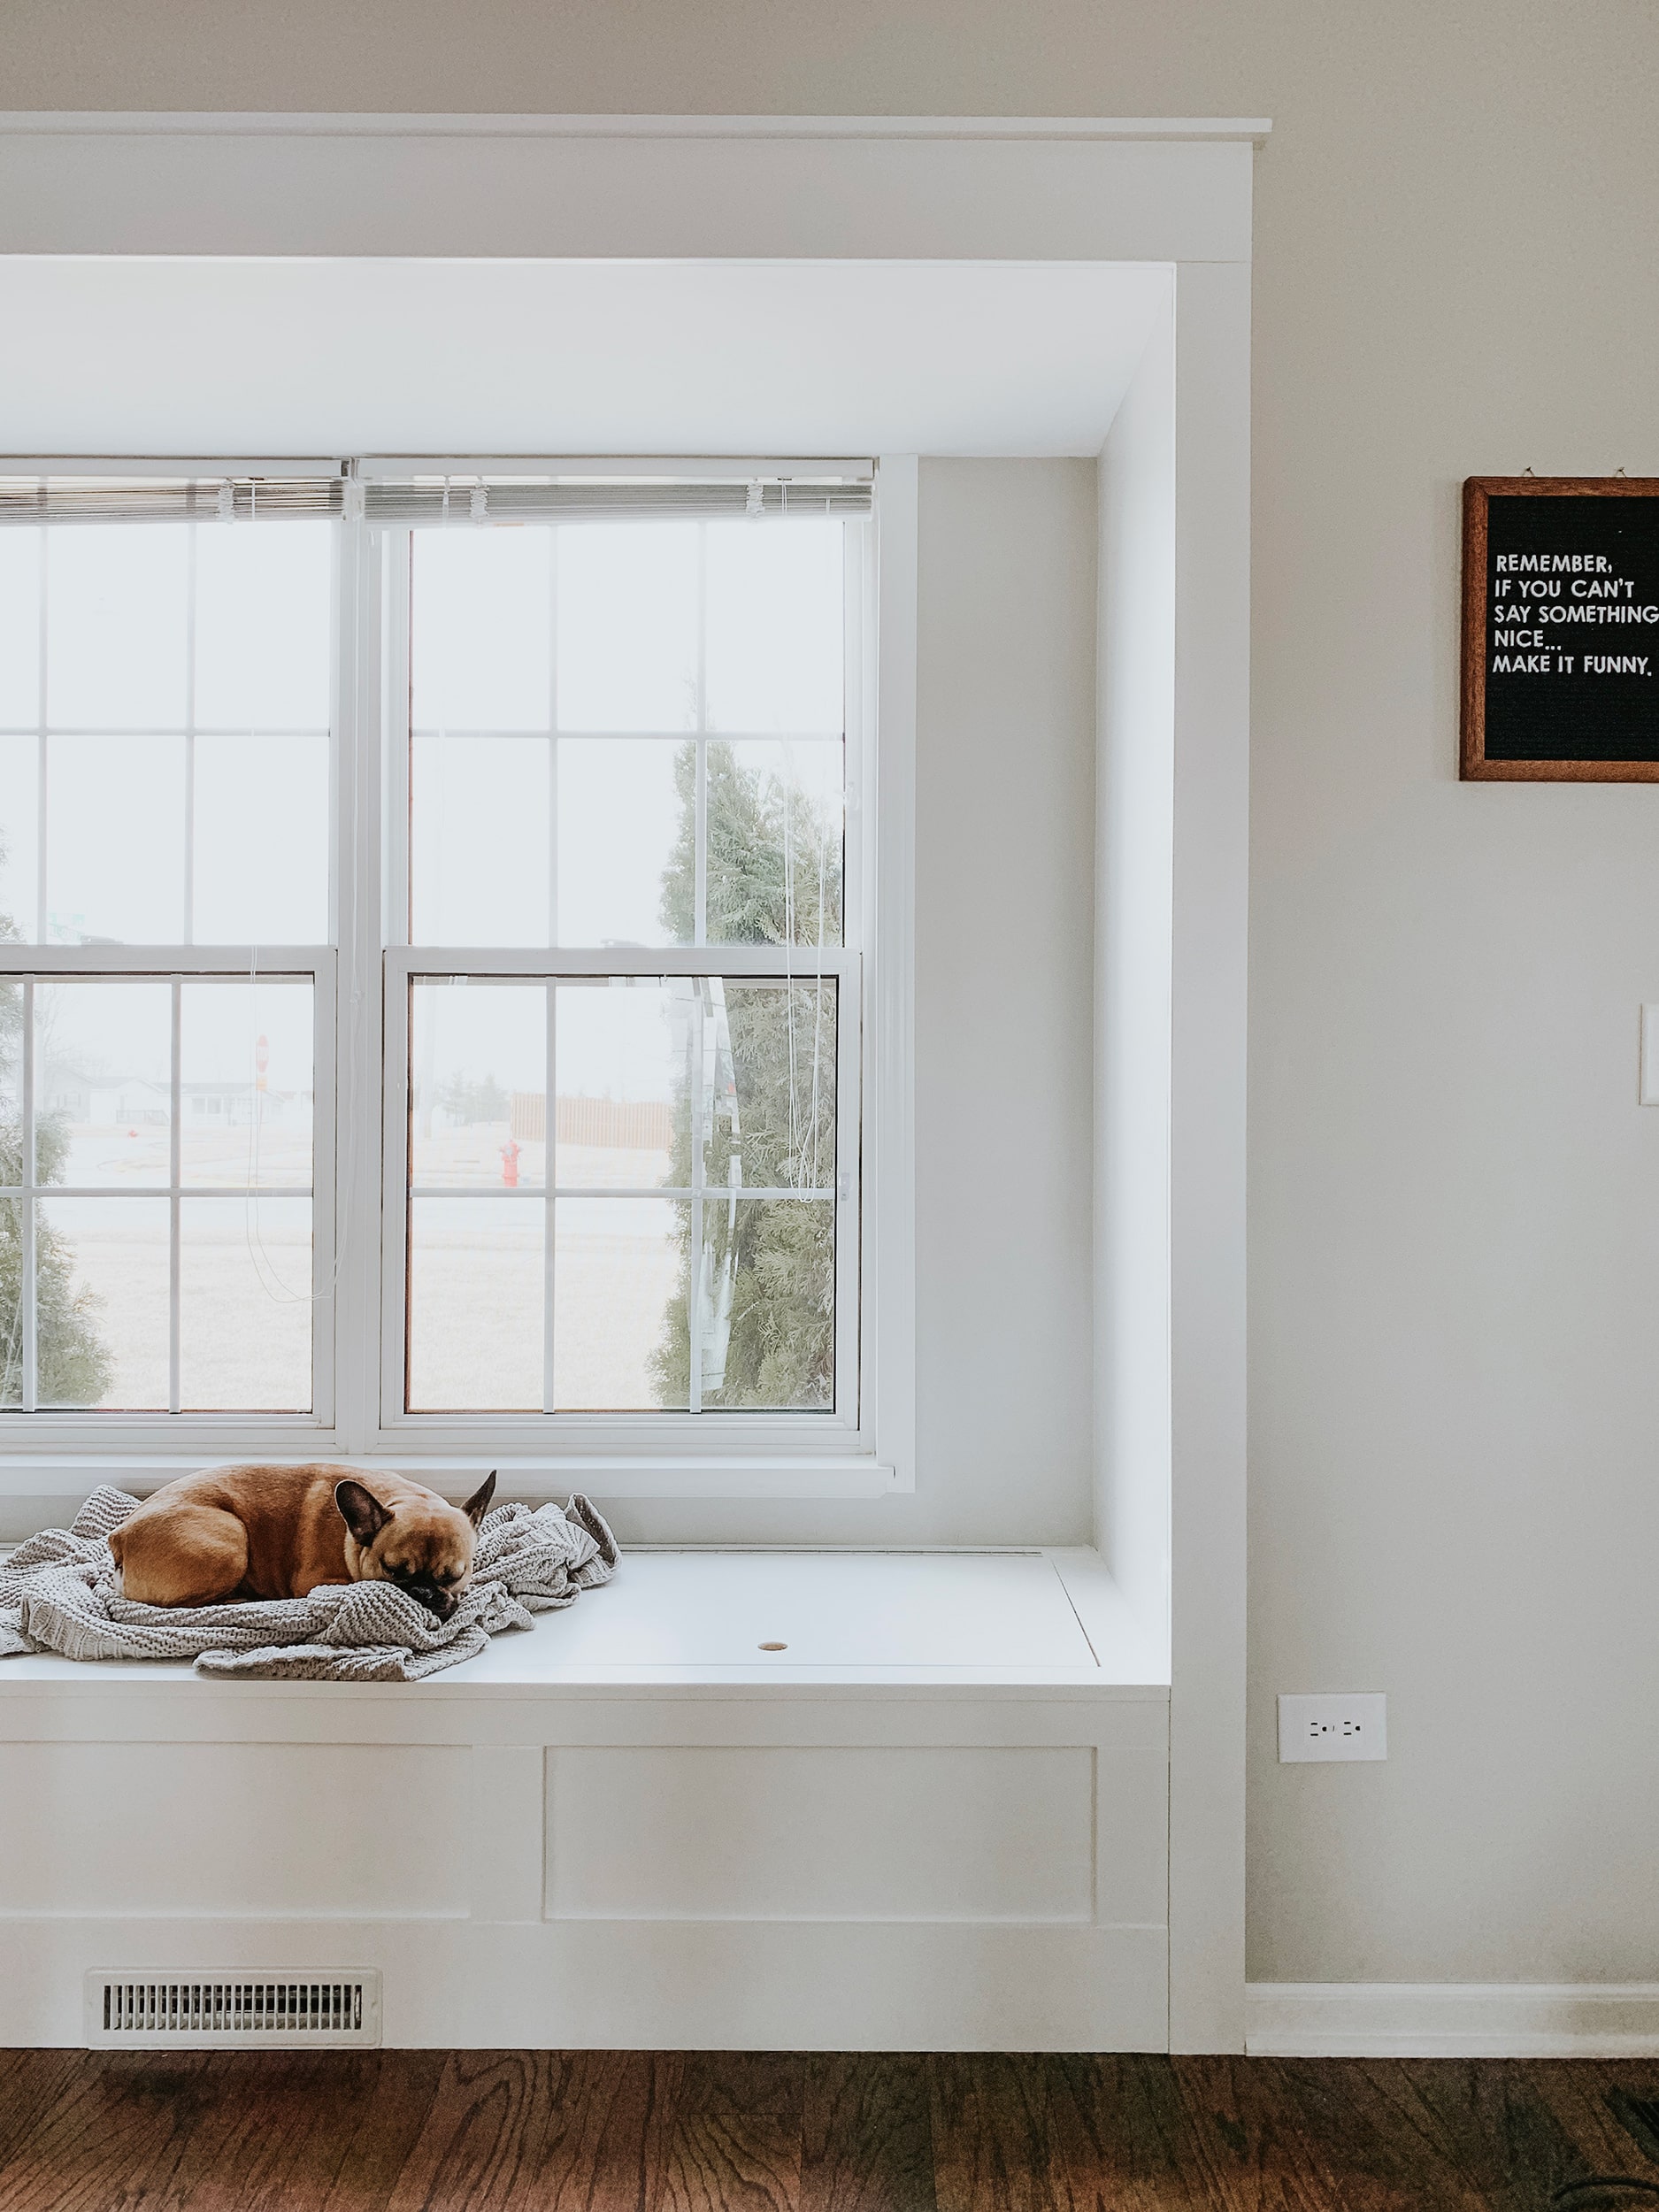
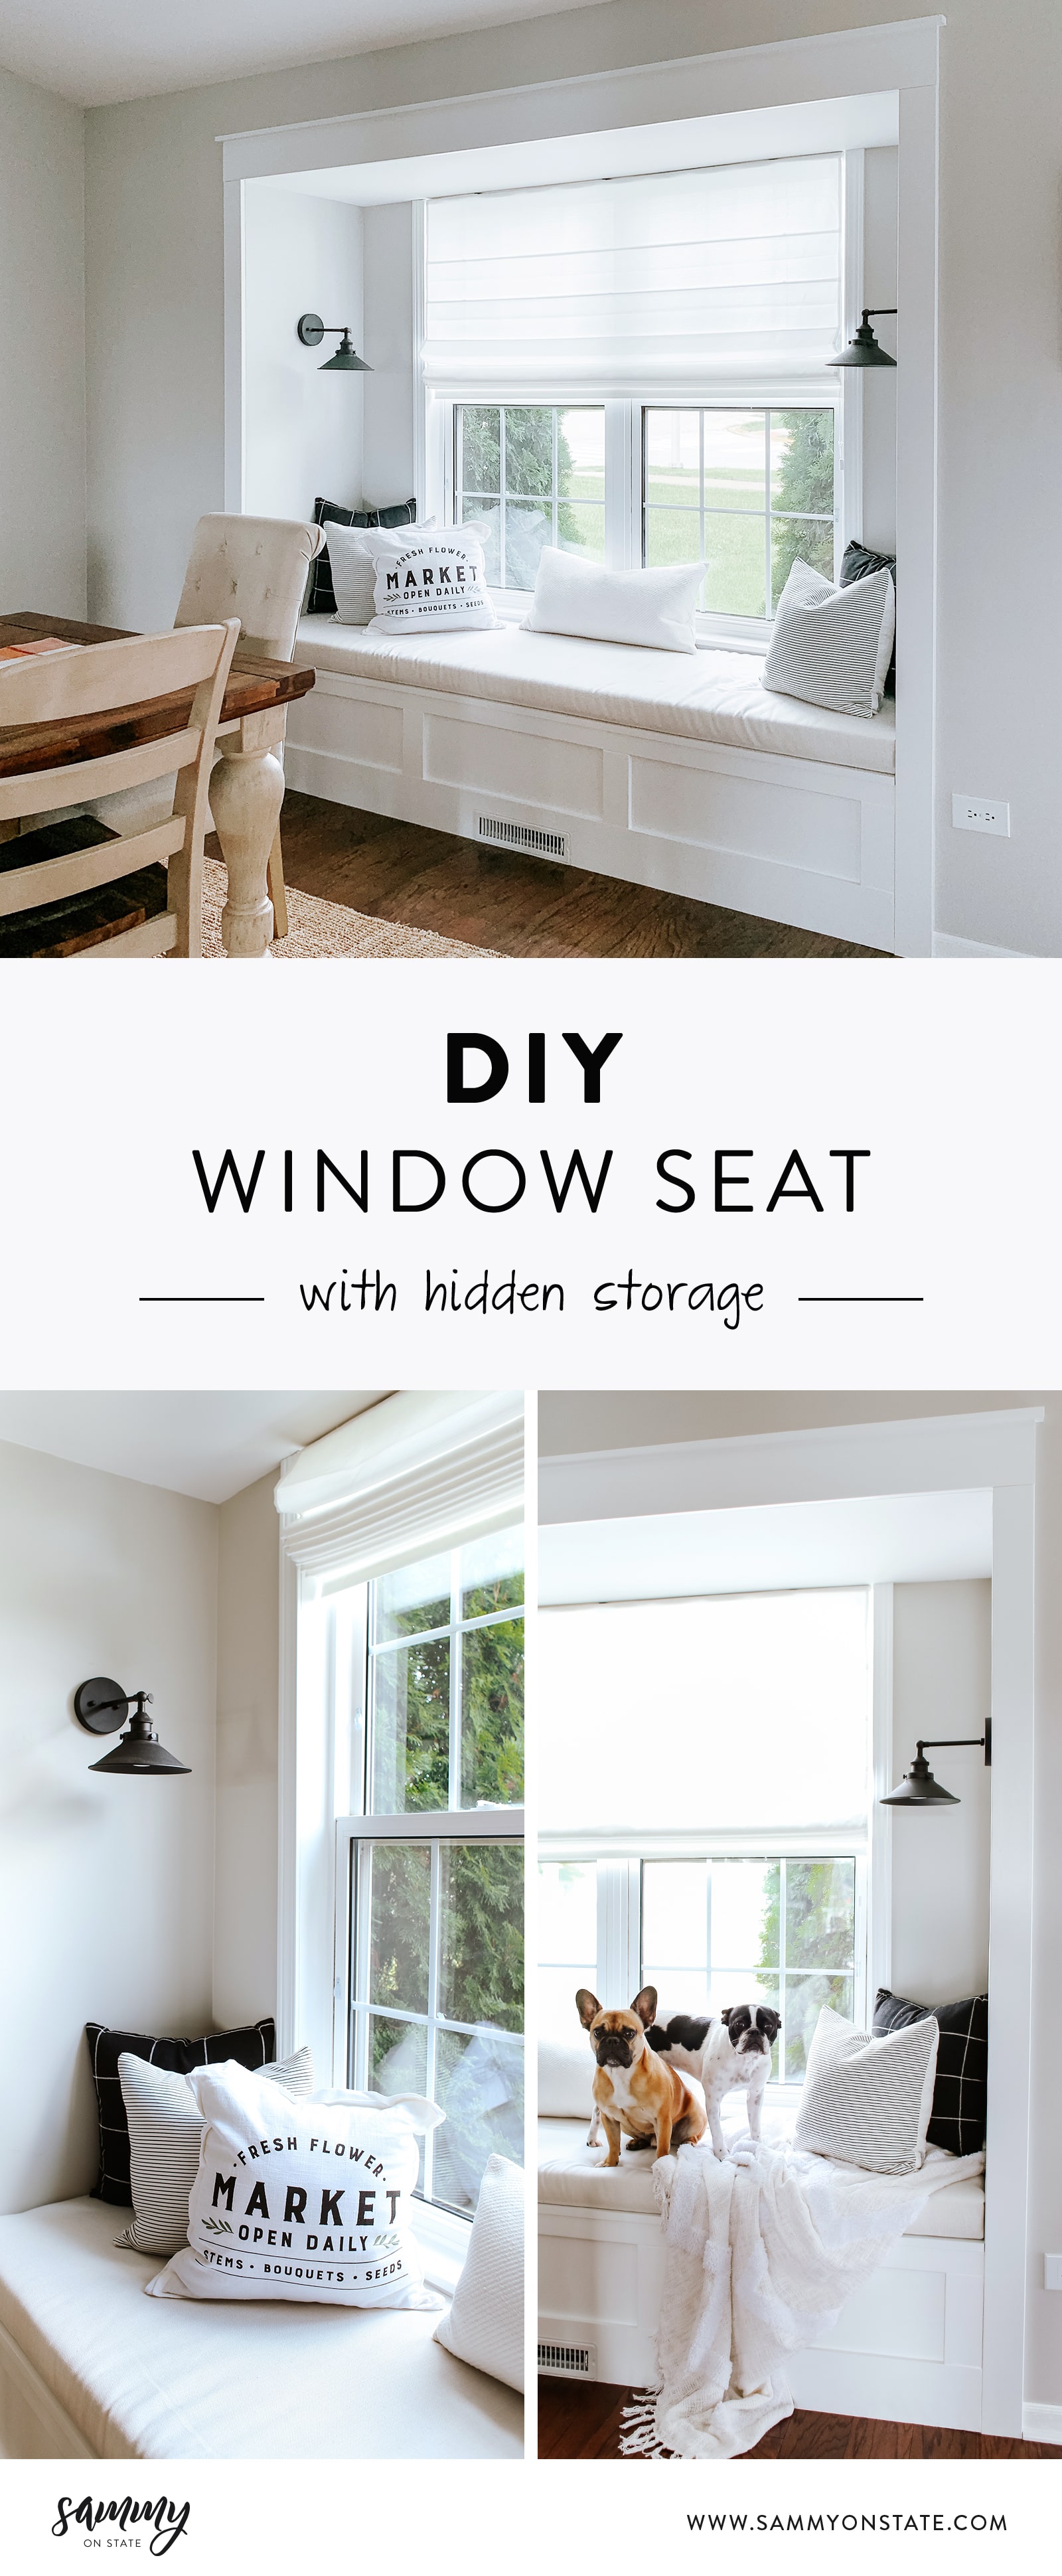
Painting this window seat area wasn't the worst. Information technology didn't take that long either (thankfully.) As yous tin can see, we too added the trim around the entire window seat area and I'thousand really happy we decided to do that final minute! It put a nice finishing touch to the entire space. And as you can see to a higher place, Figgy couldn't wait to spring on the window seat.
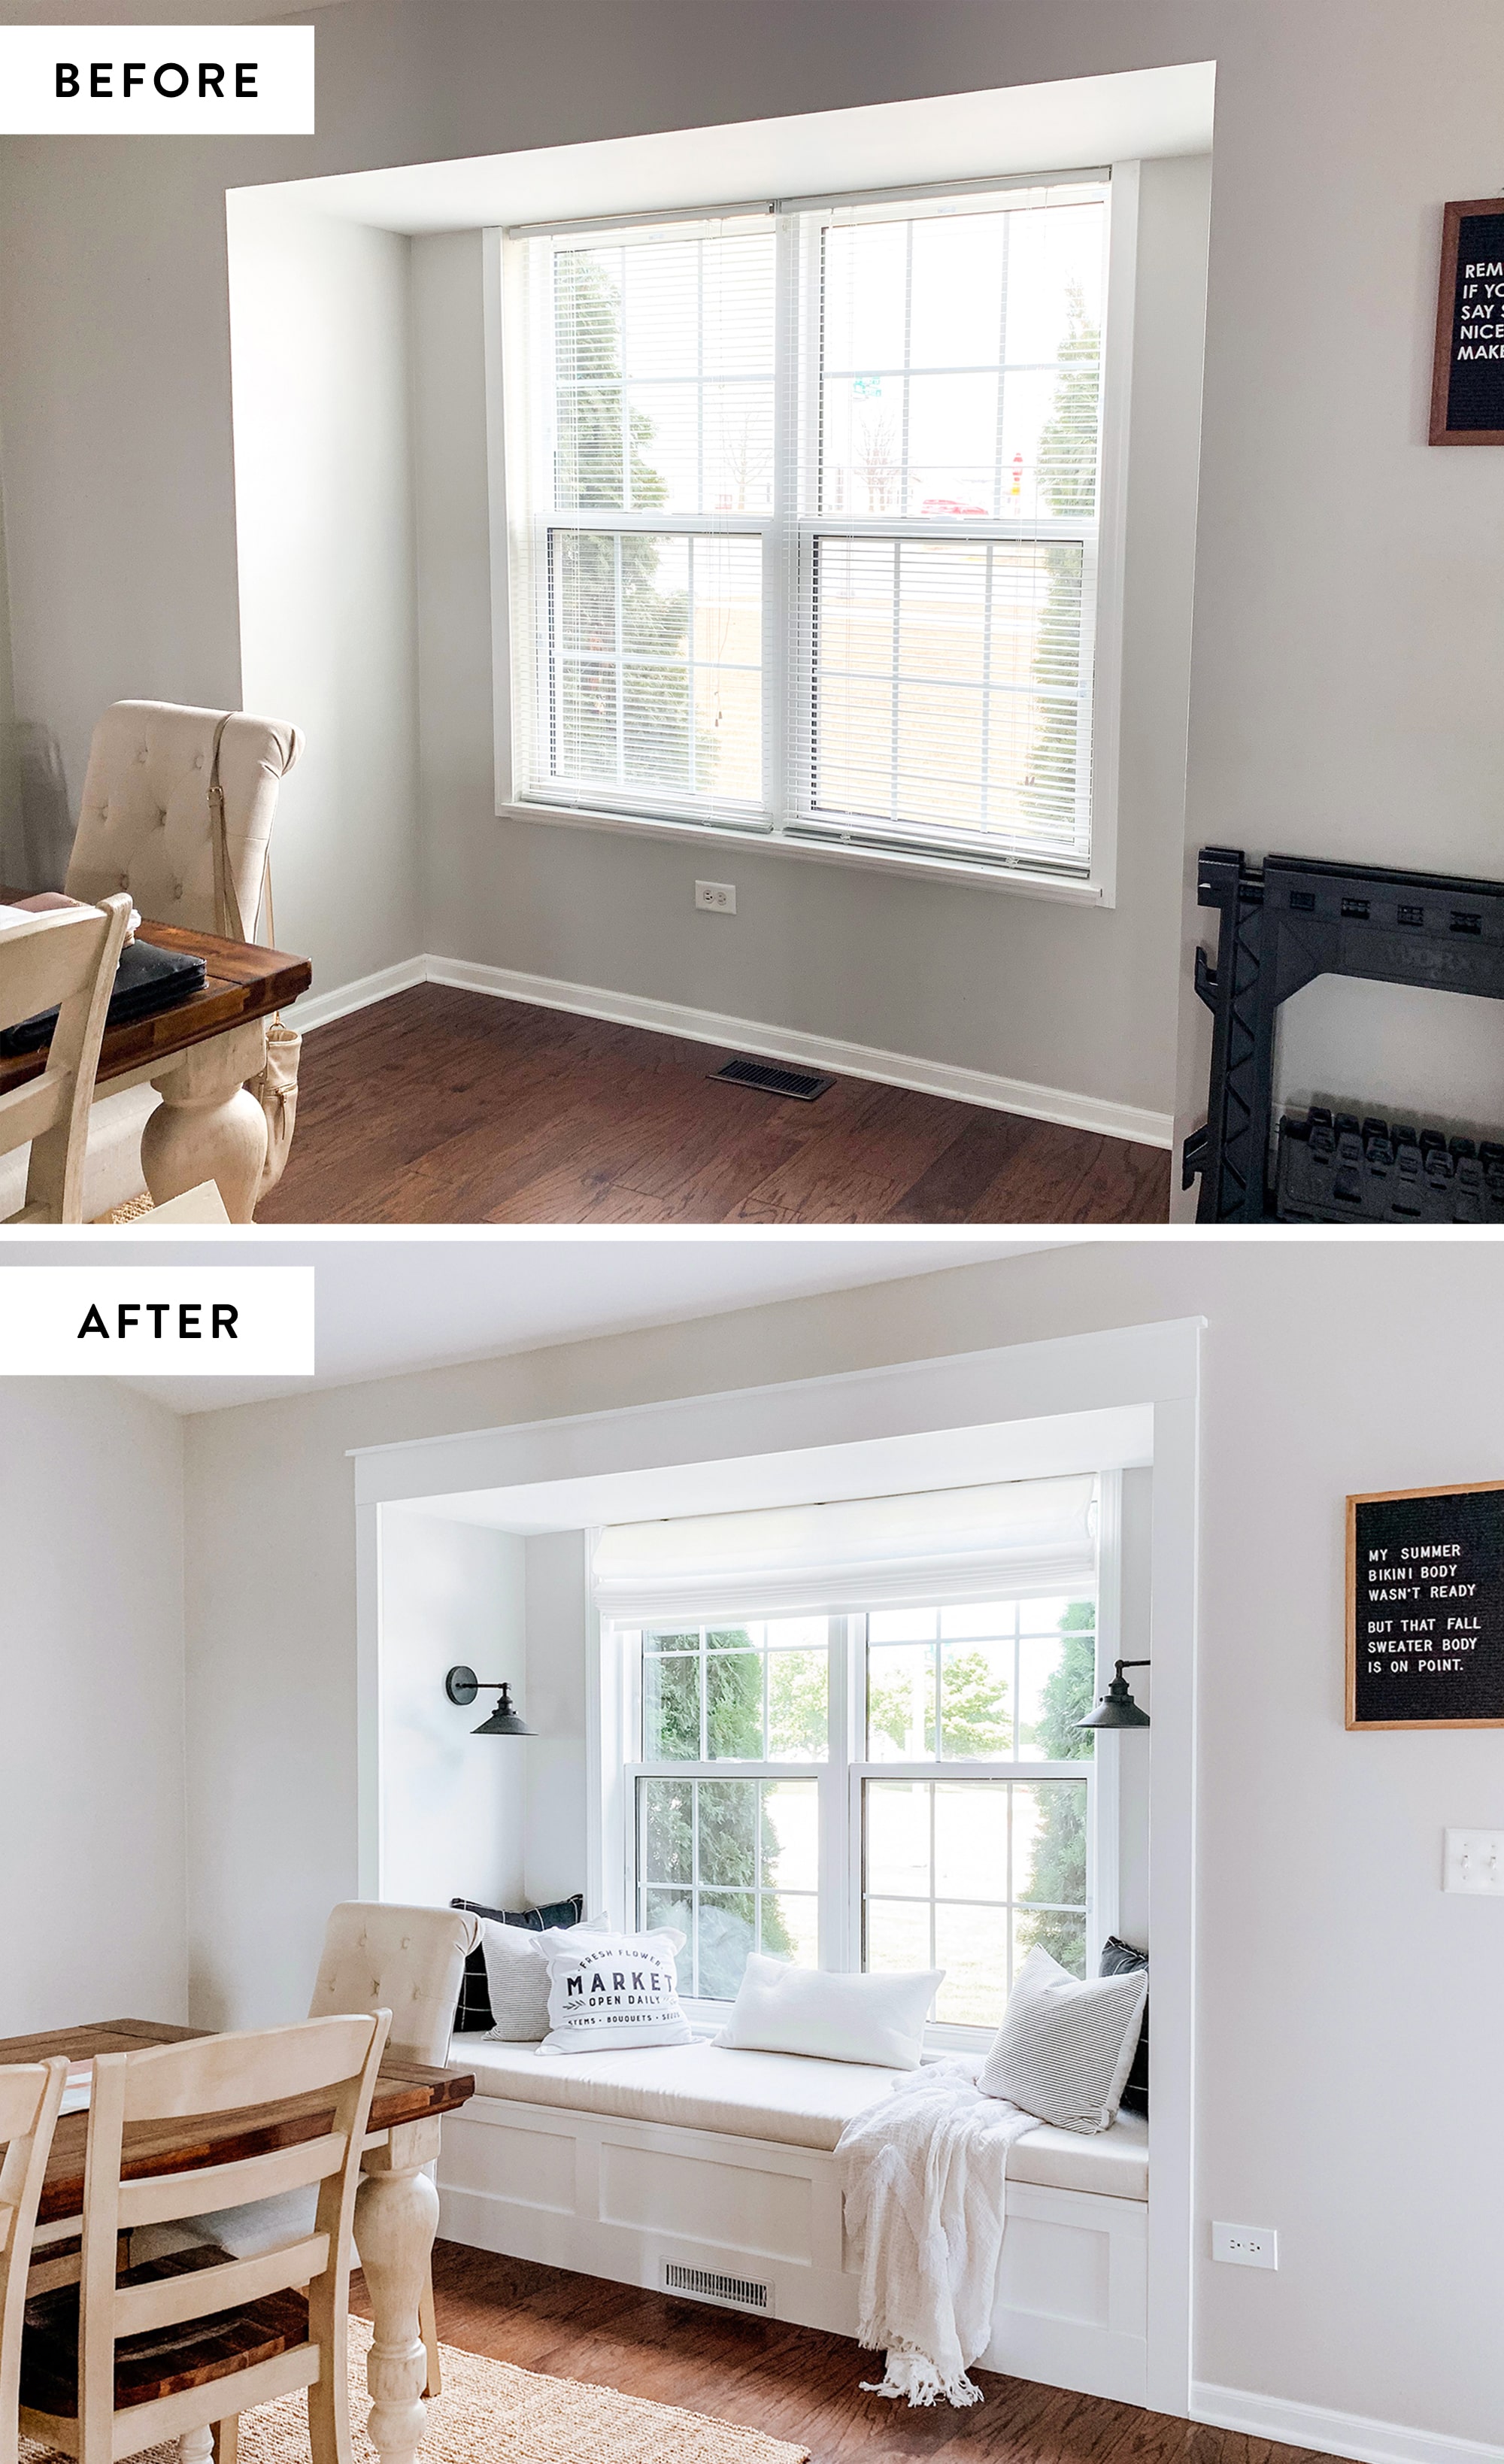
In that location you accept information technology! The window seat build is complete! At present, just to add all the concluding touches. We shared some other post that goes into all the details and the total reveal here!
Do you lot have a spot in your house you lot could add a window seat? Is that a "wishlist" item for you? Let us know below!

Source: https://sammyonstate.com/2019/09/05/diy-window-seat/
Posted by: harrellforrie.blogspot.com
0 Response to "How To Build A Window Seat With Storage"
Post a Comment