

How To Clean Self Cleaning Water Heater
How to Prepare a Water Heater Airplane pilot Light
Replacing the thermocouple commonly does the fob.
![]() Fourth dimension
Fourth dimension
An 60 minutes or less
![]() Complexity
Complexity
Beginner
![]() Cost
Cost
Less than $20
Introduction
If your hot water heater all of a sudden stops working, chances are a bad thermocouple has shut off the gas to the pilot light. Replacement is an easy DIY repair.
Tools Required
Materials Required
- Dish soap
- Long matches
- Thermocouple
No hot h2o? If you have a natural or propane gas water heater, chances are the airplane pilot has gone out. The water heater pilot calorie-free is a small flame that ignites the gas burner on your water heater. When the water heater pilot light goes out, first try relighting it, following the directions on the water heater label. If the pilot doesn't relight, if it goes out correct after lighting or if it goes out repeatedly, by far the virtually common cause is a bad thermocouple. The expert news: You tin commonly replace a thermocouple for minimal price and in less than an hour. You'll become your hot water going without waiting for a professional to evidence upwardly and you'll salvage the cost of a service call.
Read on to acquire how to lite a pilot low-cal.
What is a Thermocouple?
- A thermocouple senses the heat of the pilot and allows gas to flow to the burner.
- A bad thermocouple will shut off gas to both the pilot and the burner and then the airplane pilot calorie-free won't stay lit.

Project footstep-by-step (six)
Step 1
Turn Off the Shutoff Valve
- Turn off the shutoff valve to the gas line.
- Be sure to plough the valve ane-quarter turn then that the handle is at a correct angle to the pipe, as in this photo.

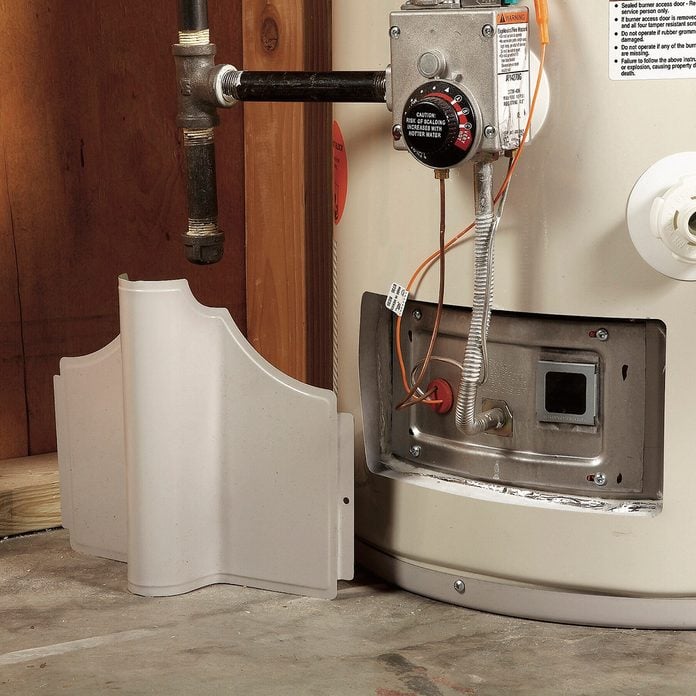
Step 2
Unscrew the Basics
- Plough off the control valve.
- Remove the burner access covers and unscrew the nuts on the gas, airplane pilot and thermocouple lines.

![]()
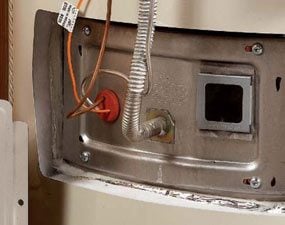
Step 3
Remove the Assembly
- Pull out the h2o heater airplane pilot light burner assembly.
- Unscrew or pull out the old thermocouple.
- Buy a new one that matches the erstwhile one in size and length.

Pace 4
Install the New Thermocouple
- Install the new thermocouple exactly like the one-time one.
- Slide the burner assembly back in.
- Reattach the three lines to the control valve.
Step 5
Reattach the Lines to the Gas Valve
- To reattach the three lines to the gas valve, thread the nuts into place with your fingers and hand-tighten them.
- Snug them upwardly with a quarter to one-half revolution with a wrench.
- Pro tip: The metals are soft, so don't overtighten.
Stride 6
Test for Gas Leaks
-
- Note: Yous must have the pilot lit and the burner on to exam for leaks, so that gas is flowing through the large tube.
- Reopen the shutoff valve.
- Relight the pilot light.
- Turn the control valve to "on".
- When the gas burner comes on, utilise a 50/50 dish soap/water mix to exam the screw joints for air bubbles that indicate leaks.
- Note: When relit, the water heater pilot calorie-free flame should wrap effectually the thermocouple bulb.
CAUTION!
Y'all should not be able to smell gas during this operation (except for a slight whiff when yous remove the gas lines). If you do, leave the business firm and call your gas utility.
When Non to Supercede the Thermocouple
Some gas water heaters accept a "closed" burner chamber, which is difficult to access. We recommend that you call a service pro to fix this type of heater. Also, some gas water heaters don't have pilots. Let the pros fix these too.
Originally Published: October 01, 2020

Source: https://www.familyhandyman.com/project/how-to-fix-a-water-heater-pilot-light/
Posted by: harrellforrie.blogspot.com
0 Response to "How To Clean Self Cleaning Water Heater"
Post a Comment